
Diy photo gear by Stockholmviews.com
Scanner camera body
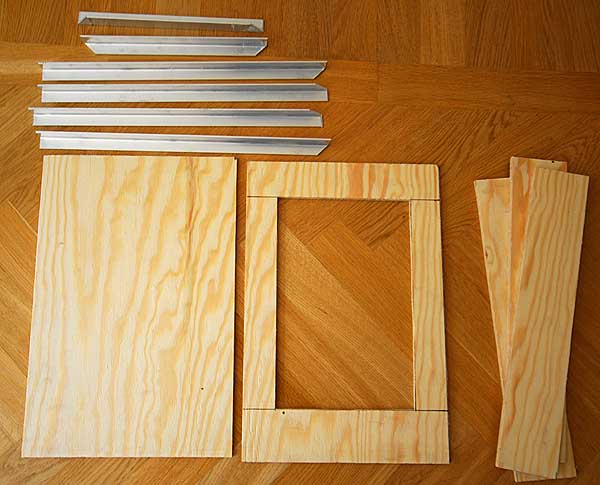
The main parts of the body of the scanner camera is made of
6mm plywood and some aluminum profiles.
All material used here is widely available at the local wood/metal store
I used the following dimensions:420x280mm for the front and back.
The front has a cut out that are 295x190mm and starts 70mm from
one of the narrower sides (a bit offset length wise)
Side walls are 80mm high.
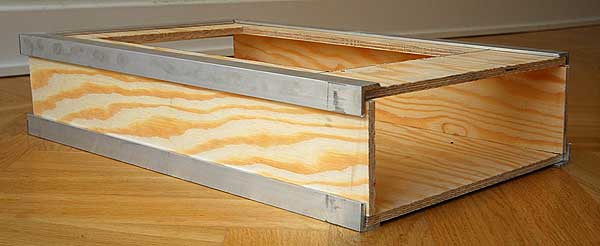
I guess that those images gives you a ruff idea' of how it should be
put together.
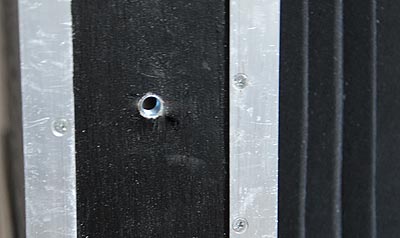
I will drill some holes in the aluminum profiles to let me use screws
to assemble the box, I will also use PU glue to make it more rigid
and less prone to get skew and distorted.
put together.
I will drill some holes in the aluminum profiles to let me use screws
to assemble the box, I will also use PU glue to make it more rigid
and less prone to get skew and distorted.

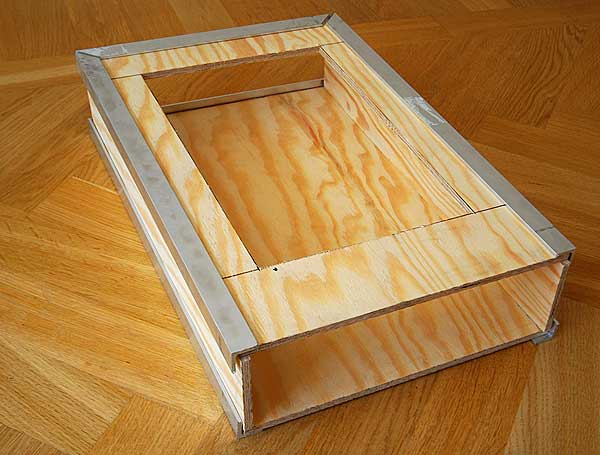
Aluminum profiles screwed and glued to the front and back
side walls just about to be mounted.
Polyurethane adhesive was used to glue the aluminum parts to the
wooden parts.
PU glue is sticky an find you more attractive than your girlfriend do ;0)
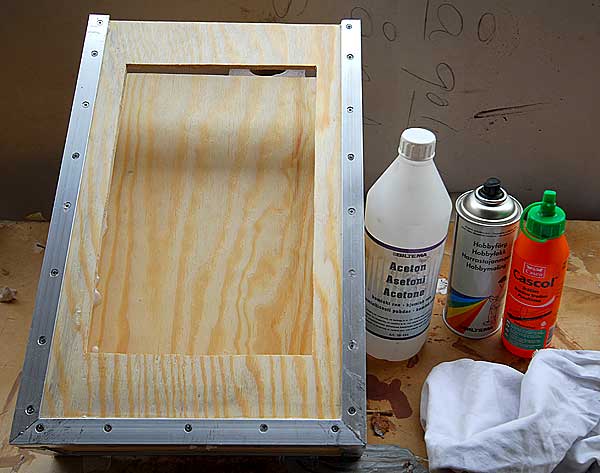
The scannercamera body (Wooden box) Cascol 1809 PU glue a rag
and black paint for the final touch.
Acetone to clean that sticky stuff of your fingers and everything else that
it sticks to!( use gloves if you are smarter than I am :0)
and black paint for the final touch.
Acetone to clean that sticky stuff of your fingers and everything else that
it sticks to!( use gloves if you are smarter than I am :0)
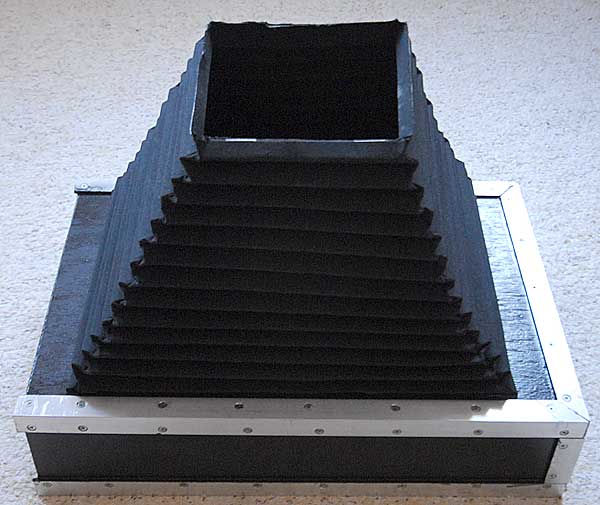
Box painted black and bellows stapled to it.
All this is easy to do but takes some time, when this project is up and
running I will post some alternative ways to make this camera for those
of you with more money than time (still relatively cheep for so much fun)
All this is easy to do but takes some time, when this project is up and
running I will post some alternative ways to make this camera for those
of you with more money than time (still relatively cheep for so much fun)
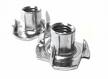
Threads for the tripod mount, I mounted one for standing mount and one
for regular.
Small image shows the nuts I used for this, fixed with epoxy glue.
for regular.
Small image shows the nuts I used for this, fixed with epoxy glue.
[Links related to this project]
-
EFT tools (To remove scanner streaks)
-
4N6site (free fourier transform plug-in possible to use for scanner defect removal)
-
Ubuntu (The linux distro I use, comes with Xsane and Gimp)
-
Gimp (Photoshop like image editing software for free linux/windows)
-
Xsane (Scanner software for linux)
-
Mike Golembewskis scanner camera (I found my inspiration from this page)