
This extruder is inspired by the new V2 QR extruder from Bondtech and are easy to print and build.
It is strong as a OX and is running smooth as cream. 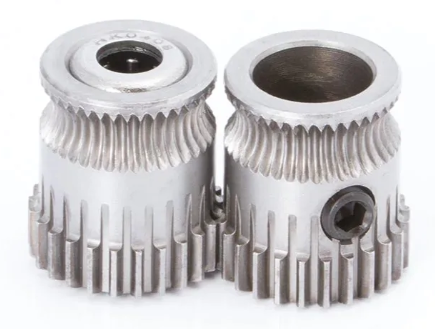
BOM for THE OXtruder is extremely short:
1set of 8mm shaft BMG drive gears (Bondtech)
1psNEMA17 Planetary 5:1 gearbox motor (AMAZON)
4pcs of M3x30 screws.
1pcs of M3x35 screw or threaded rod.
1pc M3 nut for tensioner.
1pc Spring for tensioner.
2ps large M3 washers (spring seats or just print some).
1 or 2 Bowden connectors (I chose to use one M5 treaded for the exit side and just a short bowden tube for inlet guide).
HOURS of your labor and some wait for the prints to be done.
Links to print/CAD FILES found att the botom of this page
Some inspiring photos of The OXtruder + build guidance.
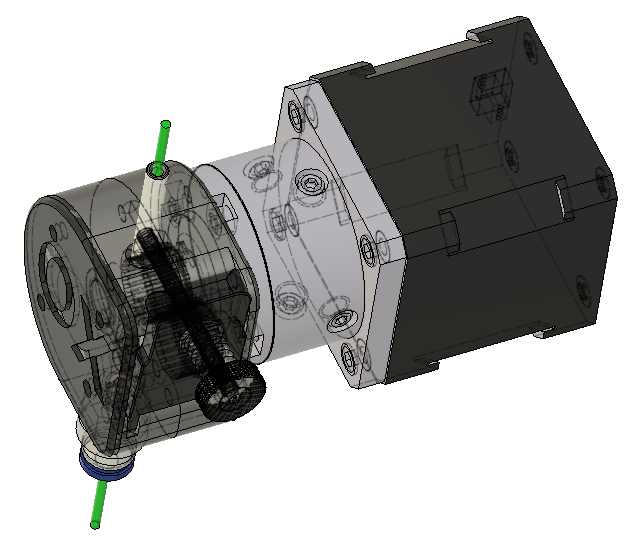
This is my Fusion360 CAD for The OXtruder
inspired by the Bondtech V2 extruder that are said to be usable both for direct drive and bowden setup however you would probably not use this monster (520gram including mount) as a flying extruder on a delta for sure ;0)
This extruder are also sharing some parts that you will recognize from the Orbiter V1.5 from which I used the pressure/idler arm. The “dual drive gears” are also the same as on the original QR from Bondtech that also been used on the Orbiter V1.5 (Orbiter V2.0 uses shorter versions of the same diameter gears).
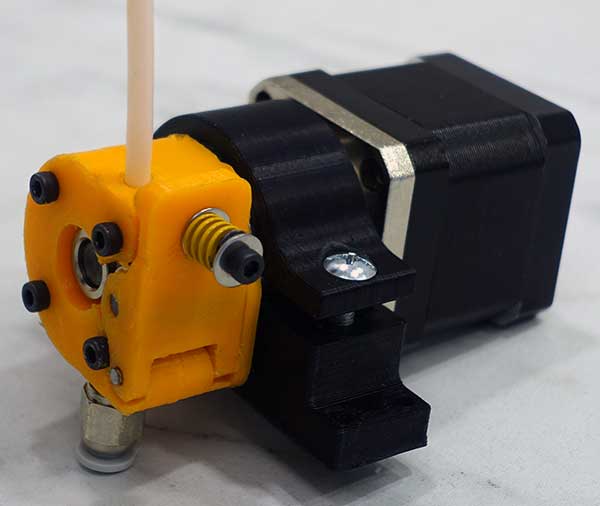
The working prototype
This is my first test print of this extruder and it came out good enough so I will use it like in this picture!
The prints could have been nicer but hey it works just fine like this, I even omitted the end cover since I find it to be more like a nice thing to offer but not really necessary.
The only issue I had was that some tolerances was a bit to tight but that is now corrected so the prints should come out kind of “ready to assemble”. For the tensioner screw there is a regular M3 hex nut embedded between the two main body halves and for the idler arm a 3mm pin or screw can be used.
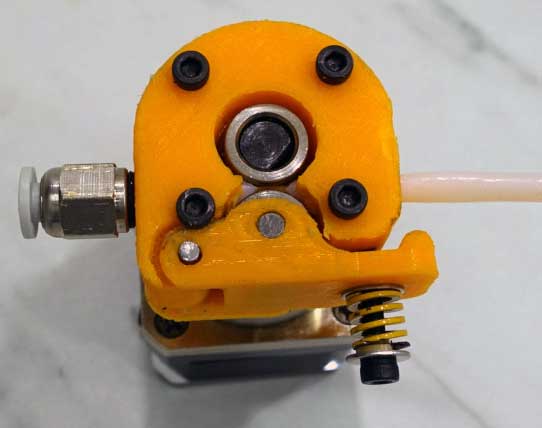
Left: This image shows one of the issues that the side cover plate will solve, the screw at lower left side interfering with the idler arm a bit.
With the end cover this issue will be solved as long as you be carful with the tightening force.
The area around this screw/hinge is slightly adjusted in the final CAD and print files.
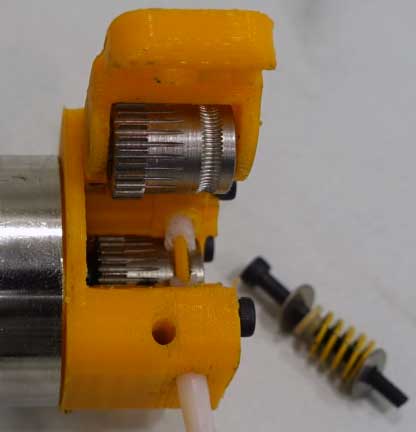 Left: The filament path will take 4mm OD PTFE tube (Regular bowden tube) as a liner for smooth and renewable filament guidance.
The Press fit connector that I used has a M5 thread, cut that thread with a tap or just drill the hole out to 4.5mm and force the connector in like a self tapping screw (Not as nice but works).
And don’t forget to put a short bit of bowden tube in before yo attach the connector ;)
Also make sure to dress the ends of the guide tubes to mate the drive gears as nice as possible.
Before installing the spring and screw for the idler make sure to have the motor gear correctly aligned wit the idler gear and filament path (Idle have a little bit of axial play to self adjust)
The OXmount

The Oxmount is designed for 5:1 planetary gearboxes with 36mm diameter edit if you need other size.
The above photos of a printed extruder is a early prototype and the CAD files are now updated with a new version. Get all the CAD files here: https://grabcad.com/library/the-ox-extruder-for-3d-printers-1
Or just the 3D print files here: https://www.printables.com/model/364011-the-oxtruder-a-powerful-extruder-for-3d-printers
Render of the new version.

13th JAN 2023 Will be updated when if needed ;)
Your feedback will be greatly appreciated.