
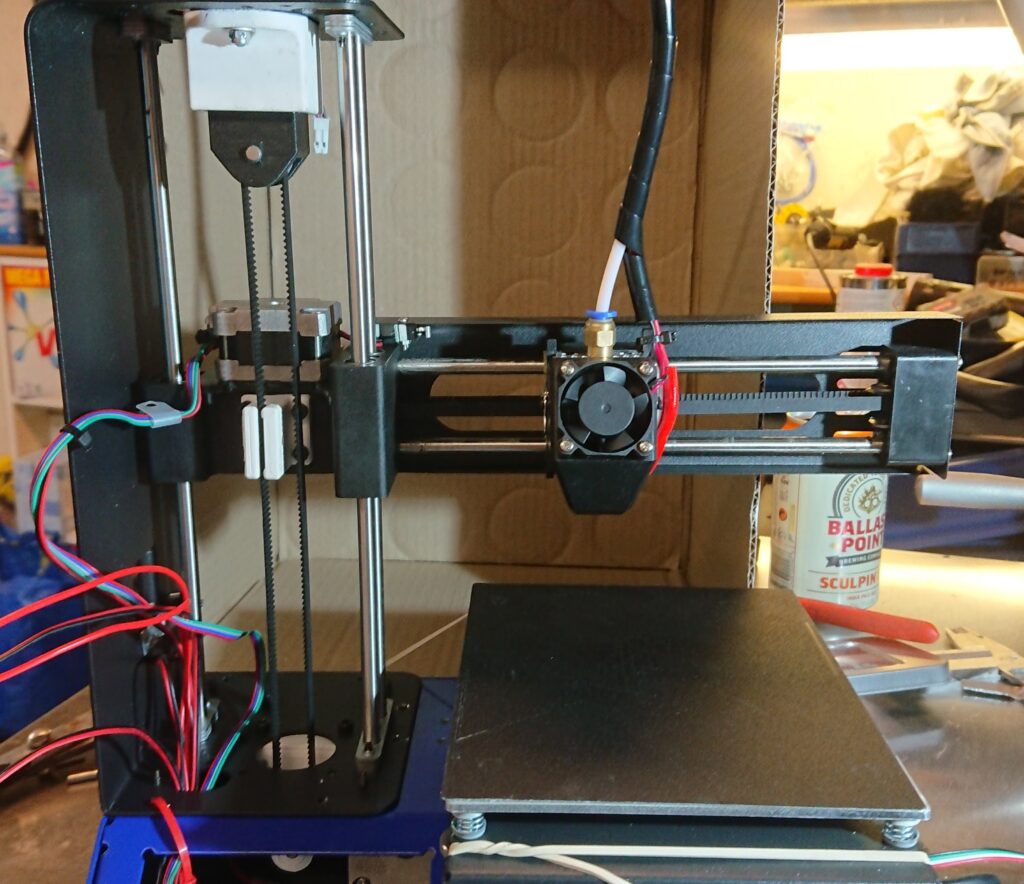
Prima Select MP120 Modified with belted Z-axis
This will be the start of this project I will list the whole plan further down this page. Up to know I’m done with the Z-axis and have installed a MKS Robin min V1.2 controller board and TMC2208 silent drivers. The Robin Mini is running Klipper firmware with Fluidd and Moonraker I will fill in with more details further down the page regarding this.
Note: File download links for all projects at the bottom of this page.
And please upload some pictures and thought on the FB project space @
https://www.facebook.com/groups/awsom3dprinters
This printer are also being branded as (in various incarnations).
Prima select mp120 v4, Profab mini, Felix tec4, Wanhao i3 mini
Malyan m200, Monoprice mp select mini (Let me know if you find more versions).
The whole mod plan for the MP Mini. worth it and fun…..
- Belted Z-axis (done)
- New main board (done)
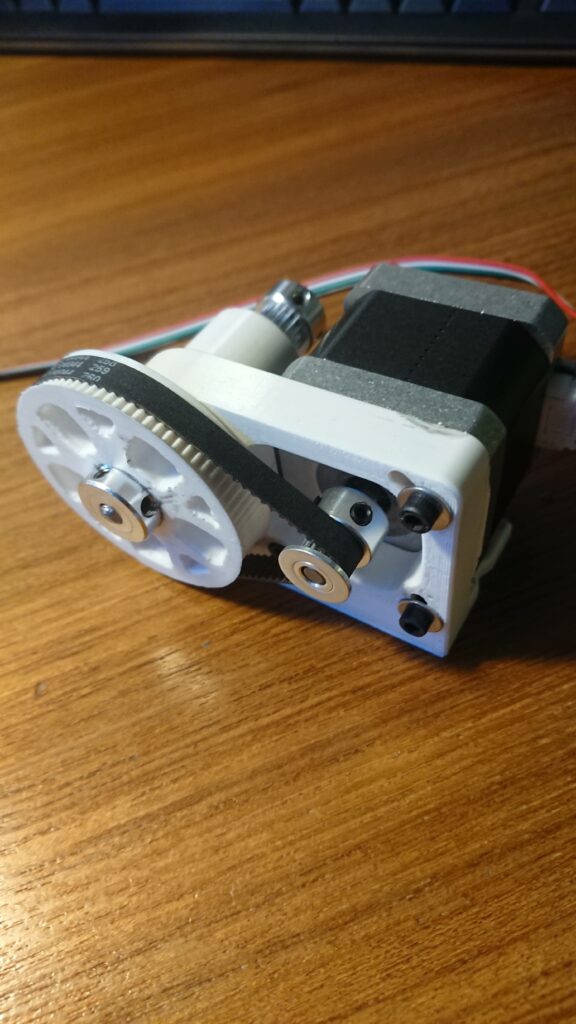
- New relocated extruder (Original will be ditched I needed the space and the stepper motor for the belt drive haha..)
- New larger and more silent fan for the main board.
- New silent solution for the tool head (still need to be compact and I will stick with bowden style extrusion system).
- Square linear rails on Z and X axis extending X a bit to be able to rech 150mm (Y axis linear rails? Maybe……. later).
- Slightly enlarged work space (Considering using a Silicone heating pad about 150x200mm or 150×150).
- 24V Power supply.
- Vibration dampening feets and bitumen damping pads on order legal xanax online sheet metal parts.
- Control display naaa, nope, njet… I prefer remote applications like the one built in to Fluidd, Mainsail or if you prefer Octoprint.
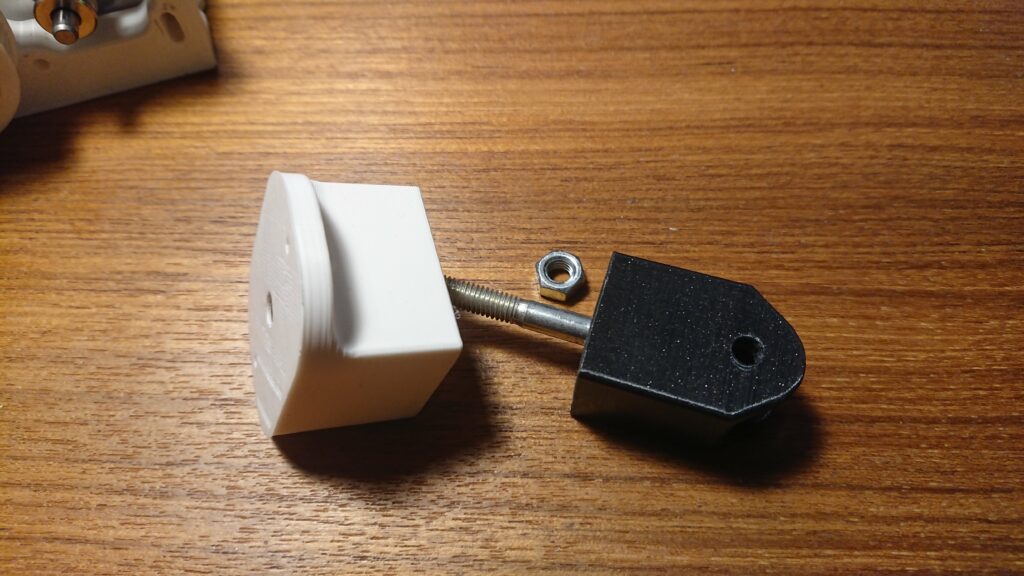
After some fine tuning of Klipper and the rotation distance parameter I did some flow rate tuning for my Add-North E-Pla (White). The one to the right was my first vase mode round corner cube @ 100% flow. The “cube” to the left was the first tuning estimate print @ 95% flow and that shows quite an improvement don’t you think so to?
Might be updated ……

Part 2 Main board replacement and Klipper/Fluidd/Moonraker install.
(I used a leftover MKS Robin Nano V1.2).
This mod is quite straight forward just follow the connector pin out schematics for the board you chose to use.
Then flash Klipper with Fluidd and Moonraker to it (Or your chosen taste of firmware).
I have been using Kiauh Klipper installer helper with success.
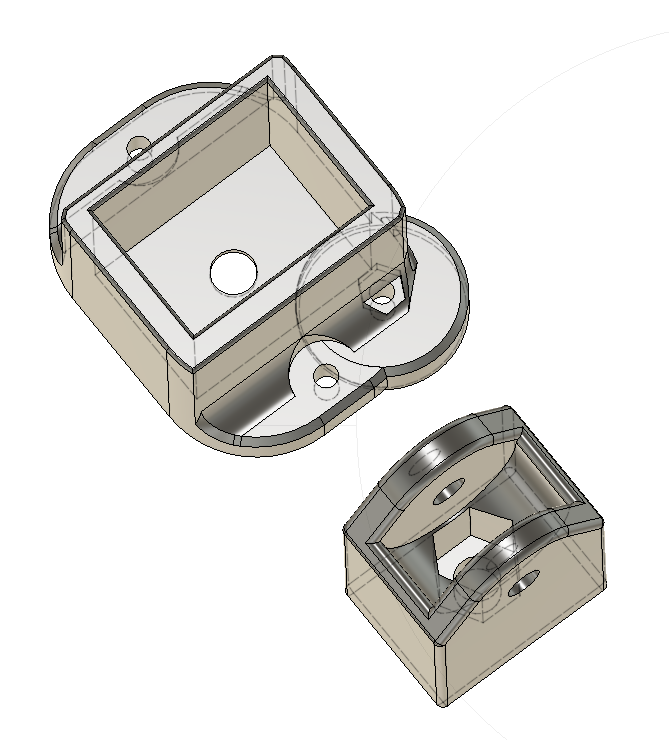
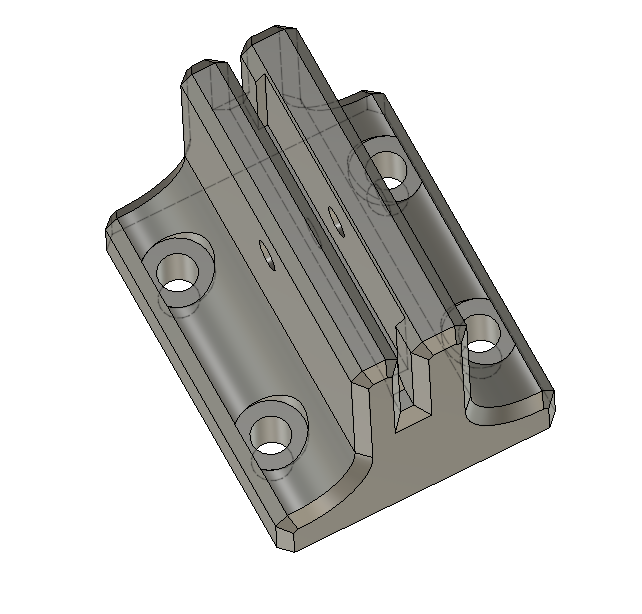
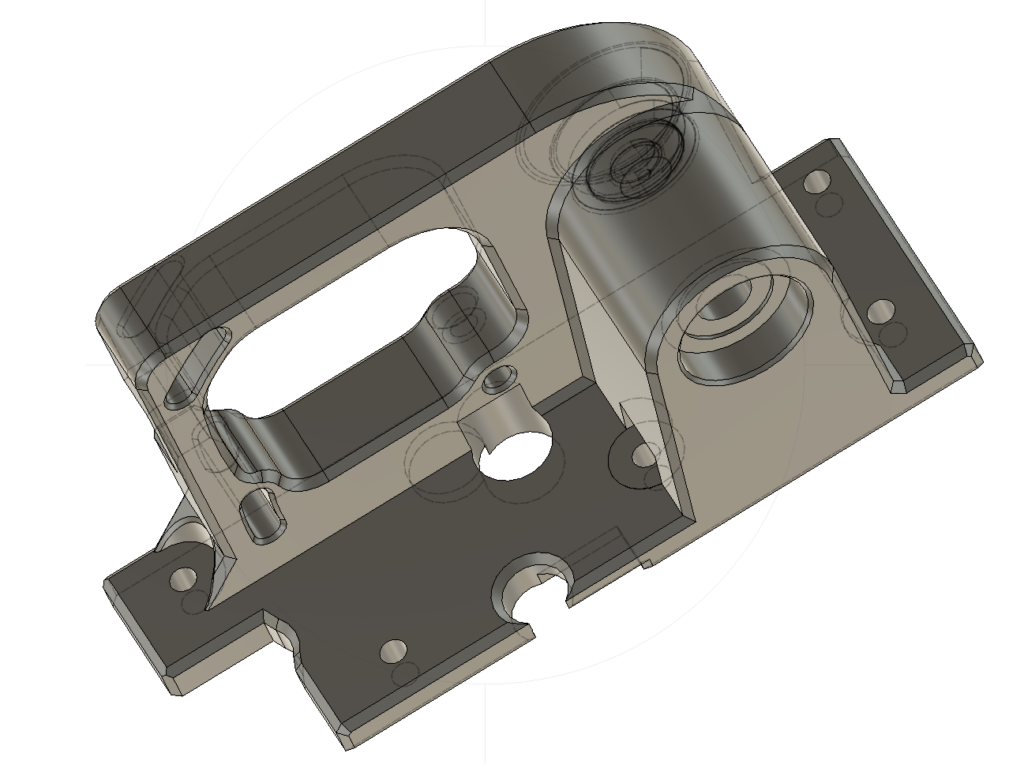
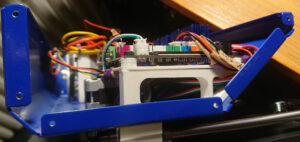
I created some 3D printable parts that will help when you try to find a place for the card in the MP mini base.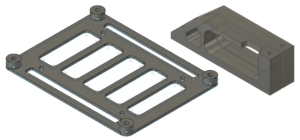 the left part and the two parts to the right in the picture will form a riser that will make it possible to mount the card a bit on the top of the Y-axis motor. I used some epoxy glue to mount the “legs” to the casing.
Some pictures to give you a hint of how to install the PCB mount.

X-AXIS My good!
Well it actually not that bad and I have decided that for now most of it will stay kind of original.
I will keep the skinny LM6UU linear bearings since during the assessment of the structure I have found out that the X-axis is in fact quite OK as long as the print head weight is kept down. Further modifications might require further modifications but that is in line with this project blog since….
This project is suppose to be possible to be done incrementally in the way that you can pick and chose which parts of the mod you want to do. I know for sure that this project will end up being “way to much” but don’t let that scare you off, my advice the Z-axis mod is thge one that will give you most value for the money and effort, it will require a relocation of the extruder and as a spin off I recommend you to get a better extruder like a quality BMG after market extruder. You will also need a new stepper motor for that extruder as the original extruder motor whent to service the belted Z-axis motion assembly, if you intend to stick with bowden filamet feed system go for this one or similar
(17HS4401) 42N.cm (60oz.in) 1.8 Degree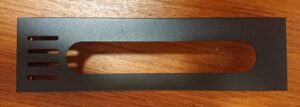
Step 1#
Remove the rattling flimsy decorative and not so good “X-axis limit switch fixing point” Picture above.
This thin piece of sheet metal do no good for the structural stiffness of the X-axis but more like creates a source for resonance and we don’t want that do we? The small bracket printed in about 5-10min will help you to remove this resonant part of the printer and potentially improve your printer for less that a raisin worth of money!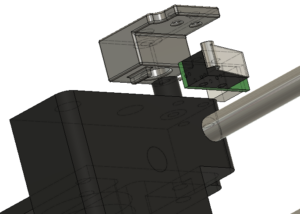
So just unscrew and put it in the bin now print the X-axis limit switch bracket and you are already in a better situation!
The X-limit Bracket X-limit-SW-bracket
DOWNLOADS
Download STL Bundle for belted Z mod
12 DEC 2021:
Download Klipper/Fluidd firmware and settings Bundle
12 DEC 2021:
Download Bundle of Robin Nano mount files
12 DEC 2021:
X-limit Switch Bracket:
15 DEC 2021:
The Belted Z mod will definitely work with other controller cards than the Robin Nano V1.2 that I’m using.
Just flash and configure the card that you have or prefer. I would used the SKR mini E3 V2.1 or SKR mini E3 V3
if I didn’t already had a redundant Robin Nano board.
Printer.cfg and mooraker.conf is the Klipper configuration files that I’m curently are using with my Klipper/Fluidd/moonraker installation. I use this set of settings for my Z-axis with 80T large pulley and 16T motor pulley, 20T Pulley and idler for Z-axis belt).
 Also visit my Youtube channel for this and other fun projects
#Prima_select_mp120_v4 #Profab_mini #Felix_tec4 #Wanhao_i3_mini #Malyan_m200 #Monoprice_mp_select_mini #The perfect by_the_side_of_my_computer_3D_printer, #Tiny silent desktop 3D_printer