
This writeup is about how to use Klipper firmware on an old abandoned 3D printer mainboard to use as a test rig for 3D printer hardware.
That was one of the longest headers that I have been written :o)
Klipper firmware can be installed on a large range of 3D printer main boards both low and high end devices. The Klipper host and UI can be installed on any Linux device with a few options of UI to use.
It can be hosted on Windows and MacOS but then you are limited to OctoPrint UI*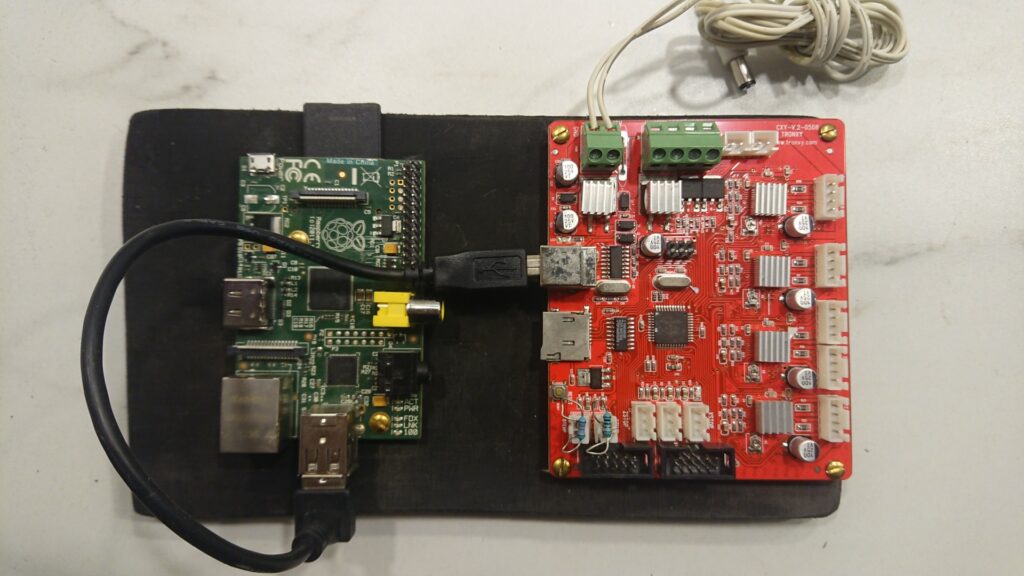
What hardware and software did I chose and why.
- Klipper firmware since it is easy to tweak and change hardware config simply by edit a single text file.
- Fluidd User interface because it has a modest demand on the host hardware it can actually run ok on a Pi Zero first gen or a Pi of the verry first editions it also have a nice looking UI with lots of config options however not as extensive as OctoPrint but I like it clean
- ANY Board that might be close to the trash bin or in the recycle bin that fits the task and there are many at Github you can find those that already have a prebuilt config but it is definitely possible to get most boards with compatible MCU to work.
- Why? I wanted to be able to test new hardware like extruders and complete print heads of the printer before installation. Also I can use the bord to heat up a clogged hotend for cleanup, no oven no heat gun needed!
- Write up purpose Well it isn’t quite as straight forward as you think to fool Klipper to work with a lot of hardware and sensors absent so I will let you know how to cheat ;)
*Att least least time I checked.
Installing Klipper host on any Linux machine Raspberry pi or other
- This is the easy part if you prefer easy, look elsewhere if you fell to be “advanced”.
Install Linux/Rasperry OS or whatever Linux you feel for. - Visit Kiauh at github and follow the easy instruction to install Klipper, Mooraker and Fluidd just install Fluid, Moonraker and Klipper (Or chose any other config and “you are on your own ;) ” https://github.com/th33xitus/kiauh.
https://www.obico.io/blog/install-klipper-with-fluidd-ender-3/ - Install firmware on your old “but newborn 3D hardware testing motherboard” 3D printer
motherboard. If you prefer video this is someone else tutorial or you can get a ready made iso here Fluid Klipper ISO - Surf to the ip your klipper install was installed at, if you cant find it look in your router config or get the excellent Fing app 4 free to check your connected network devices for IP!
Configuring Klipper/Fluidd as a test rig
This is was this post is all about, geting klipper/Fluidd to run is covered by many other websites and bloggs so lets get on with what you are here for :D
Now when you have Klipper running and are able to connect to the host lets get in to the configuration.
Here is where you figure out that Klipper are quite safe in basic configuration, it will not allow many deviations from an expected 3D printer config.
So in my case when I wanted to test my newly designed The OXtruder I had difficulties to run the extruder only because Klipper expected that I had….
- Homed the printer
- Heated the “hotend”
- Heated the “bed”
- ……
How to cheat Klipper
Homing the printer without homing the printer insert or edit this [force_move] in to printer.cfg in klipper menu (http://xxxxxx.x.x/#/configure)
[heater_bed]
heater_pin: PD4
sensor_type: EPCOS 100K B57560G104F
sensor_pin: PA6
min_temp: -273.15
max_temp: 200
[extruder]
step_pin: PB1
dir_pin: PB0
enable_pin: !PD6
rotation_distance: 34.095
microsteps: 16
gear_ratio: 5:1 # Orbiter gear ratio
nozzle_diameter: 0.400
filament_diameter: 1.750
heater_pin: PD5
sensor_type: EPCOS 100K B57560G104F
sensor_pin: PA7
min_temp: 0.0
max_temp: 240
max_extrude_only_distance: 500.0
min_extrude_temp: 0.0
[force_move]
enable_force_move: true
# Set to true to enable FORCE_MOVE and SET_KINEMATIC_POSITION
# extended G-Code commands. The default is false.
Complete Tronxy x5sa CXY-V.2-0508 Config file
File above will most likely get you going to produce a lab board with virtually any 3D printer main board.
I have done the same with an old Ender 3 Pro board (Pre silent board I may upload config for this board later).
Faking heater sensors
The easy way is to jumper the heater sensor pins “sensor_type” and “sensor_pin: PA7” is your targets) on the board with appropriate resistors.
If you chose to have the same sensors as named in the config as in my example you will be fine with 18-20K for extruder and 10-14K for heated bed, check image.
EPCOS 100K B57560G104F Data sheet
NOTE: Values above may be dependent on you board/sensors/steppers/gearing e.t.c
Contact me if you get lost but not until you have hit the wall ;)
Proof of working riggs.
Water cooled hot end prototype (sorry for the flickering LED lights I’m kind of a rookie on video, I will try to better) .