
Xpan scanning, best practice panorama film scanning
Xpan Panorama stitching
There are several options for this part of the xpan scanning procedure.
- By hand which is quite easy since there is no distortion at the merging point
and their shouldn't be any other differences between the half either as long
everything went the way we wanted it to during the scanning.
- Using a stitching plugin for your preferred photo editor (Built in or 3rd part)
The Adobe way
Adobe Photoshop CS3 CS4
as well as several versions of Adobe Photoshop Elements
have the
Photomerge function included.
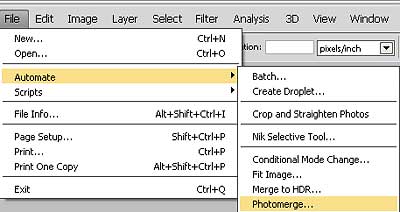
In Photoshop you will find the photomerge the way showed below:
"File/Automate/Photomerge"In Photoshop elements 7 you will find it at:
"File/New/Photomerge©panorama"
From this point it looks the same in both versions of PS.
Since we don't have to deal with distortion lets select Reposition.
Then we import the two half's that we like to merge when done just hit OK.
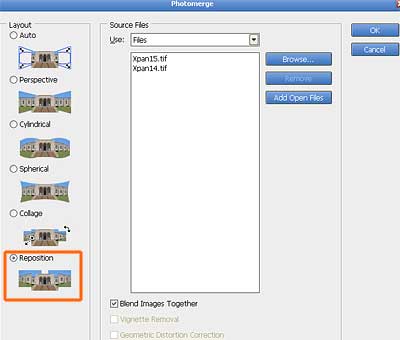
If everything went fine you will now se your panorama in the main window.
It still in layer mode and you might spot a crack in your image.
Don't despair the crack is just an illusion :0)
Now just select "Layer/Flatten image" and we are done with this step.

This is how the raw Xpan stitched image can look.
Stay cool and just accept it, lets pretend this is your undeveloped image.
We take care of the colors and exposure in the next step.
Other alternatives
Check out the section "Alternative software" in my Gigapan review and you may find
other fine alternative stitching software.
In this particular case I would have tried the Panorama factory software that
would work just fine.