Why and how to anneal 3D printed plastic parts and how to build precision 3D-print annealing oven
Note: This page is still under work and changes will show up frequently.
PLA is the most common filament materials for 3D printing but like all kinds of polymers PLA also have some plus and minus posts.
+ Easy to print on any commercial 3D printer even the cheapest ones.
+ Nice price
+ Commonly available
+ Loads of colors
+ High stiffness
– Degrades from UV rays and generally doesn’t work for outdoor use.
– Doesn’t like temperatures above 65C.
– The stiffness can give the impression that PLA is brittle.
However this only applies for standard PLA and used without post processing.
New PLA blends have been developed that will give PLA very high performance even as a engineering material.
PLA and HT-PLA can also be improved even further by annealing (heat treatment) and responds to this process very well. HT-PLA have been developed with annealing in mind so this type of PLA blends are best suited for the task.
However some of the regular PLA’s on the market have also been found to work almost equally well but that is another story ;) HT-PLA @ AMAZON
ASA This is a polymer that is kind of a ABS on steroids I like this filament
+ Mechanically god features makes it perfect for engineering parts.
+ High resistant to the U.V. rays where ABS fails.
+ It works well in aplications where water is involved.
+ Dimensional stability is good.
+ Easy to get good looking prints with (given that you have an enclosure for your printer).
+ God resistant to chemicals treatments can be smothed with acetone like ABS.
+ Higher thermal resistance than ABS
Sticks realy well to to the bed on some types of beds even a bit to well!
Both ASA and ABS Can be annealed but does not benefit from it as much as PLA does.
ASA @ AMAZON
The most common way to annealing 3D printed parts is by preheat the electrical oven that many of us already have in our home then keep the print in the oven for a set time then keep it in the oven and let it slowly cool down.
In my opinion mixing food and cinnamon buns with plastic baking is not so nice!
Neither is the baking oven particularly good at keeping the temperature at a precise temperature so by searching the web I got the ide and a complete solution to the build of the …….
PID controlled annealing oven for 3D prints
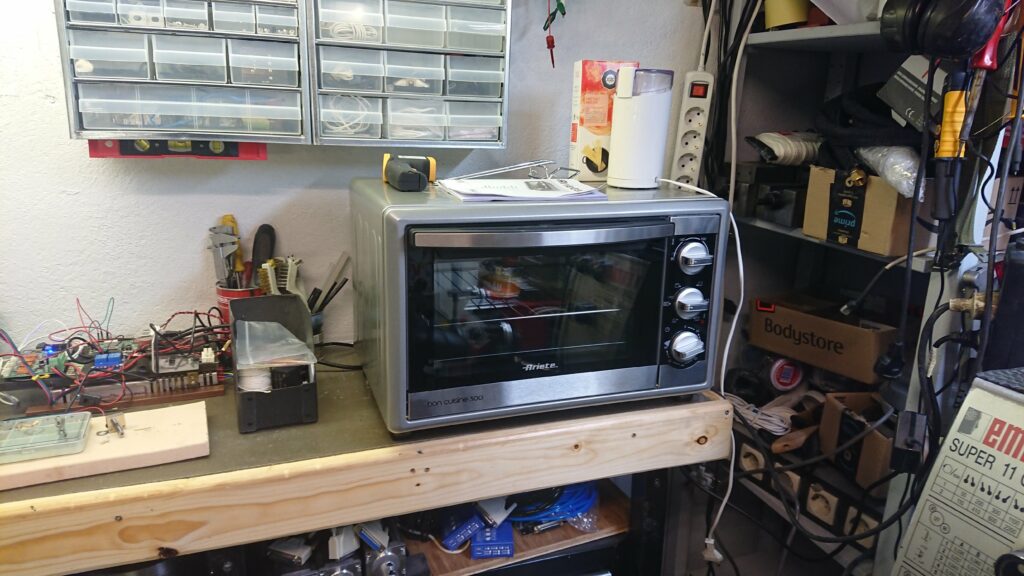
This oven will be further modified I got my Mini oven from Amazon

The setup above was working quite well I simply put a power outlet connected to the SSR (Solid state relay) and then connected the oven plug to that one. However that was an issue with that simple setup, the fan was also controlled by the PID and I had to turn the fan of to be able to use the oven this way. Another issue was that I couldn’t easily change the ramp up or tune the curve to achieve and hold the super stable temperature that I wanted to keep for a long time.
The Raspberry PI soak/ramp PID controller solution.
Again I was consulting WWW and after quite a few hours of research and a equal amount of testing various solutions as ESP8266, ES32, Arduino I finally settled for a Raspberry PI solution (I’m using a PI Zero W gen 1).
I found the excellent project Pico Reflow which is a project originating from Pi Kiln controller this project will now get its use in the 3D printer world as a PID ramp/soak PLA annealing oven.
Now it is time for a disclaimer read it HERE!
We start with the BOM for the PID
Clicking any links on this page helps to keep my website running but you can chose to buy wherever you like without getting any hard feelings from me ;)
- Raspberry Pi Zero W (Or a regular PI).
- Power adapter for the Pi.
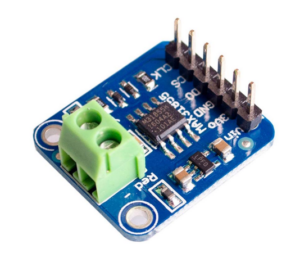
- Supported SPI driven Cold-Junction K-Type Thermocouple converter
.MAX31855 Best option
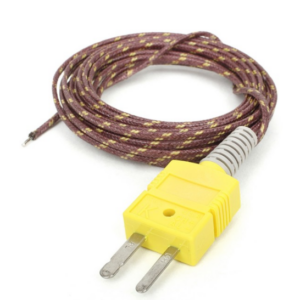
.MAX6675 A bit cheaper - K-Type Thermocouple (Get a few of the cheap naked ones they have faster response than the fancy stainless steel type).
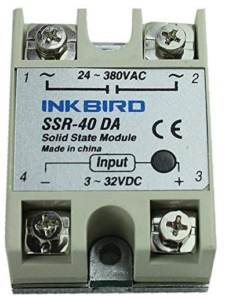
- SSR (solid State Relay) get one that can be controlled by 3-32V DC.
The SSR need to be able to switch your mains 230/240V AC in Europe load side for heater circuit - Miscellaneous wires and connectors that you probably already own if you will do this project.
Putting it together software and PID hardware.
I could serve you with loads of text here but I feel that this is kind of unnecessary as most of what you need is already pretty well documented by others so I start with a link library but to simplify the install I will also supply you with a “ready to use” Raspberry Pi image file that may our may not work for you read the enclosed read me file carefully.
PID Oven Sources:
https://apollo.open-resource.
https://github.com/apollo-ng/
https://projects-raspberry.
In regards of hardware there is loads of mini ovens to chose from I suggest you get the cheapest one you can get that suit your needs in regards of volume but an oven with fan to distribute the heat more uniform is nice. You will not need any fancy LED displays and timers as your new Raspery Pi PID will take care of all that.
The .img file of my Raspberry Pi Zero W can be downloaded here: Warning file size 1.5GB
Note: I will upload a new version with some changes so please look back. Time scale in minutes instead of seconds, some standard curves for most common filaments included.
After download unzip file and flash to your RPI SD card with then open the sd card and create a new wpa_supplicant file with the credentials for your local WiFi. HOW TO WPA_SUPPLICANT
Now find the IP of your new Raspberry PI PID Controller (Check in your routers DHCP log or check with a network analyzer app like FING). Now enter rpi ip 123.45.6.7:8081 in a web browser on a local PC/MAC to get the web interface. Or if you prefer install GUI on the pi can be useful if you are “off grid” or doesn’t have access to a local network (Not recommended unless you use a full size pi like 3B+ or RPI 4 ) and open browser on RPI and enter http://127.0.0.1:8081
Install XFCE on a Pi Lite installation (Like my img file).
Connect your pi to Screen and keyboard/mouse
Boot pi and at the promt run the commands in the list below.
Wait for each step to compleat until you run the next command).
sudo apt update
sudo apt upgrade
sudo apt dist-upgrade
sudo reboot
sudo apt install xserver-xorg
sudo apt install xfce4 xfce4-terminal
sudo reboot (Now you should have a GUI with a browser that you can point to http://127.0.0.1:8081 to open the PiPid web interface more about the interface furter down the page.
The oven I have chosen is a 20 liter 1500W
An oven with 4 heating elements (2 in the bottom and to at the top).
As we all know heat is radiating mostly upwards and since we are not going to make any toast in this project oven I decided to move the two upper heating elements down to the bottom beside the two that was already there.
In the current modification state I have decided to keep a rotary selector to be able to choose 750 or 1500w and turn the fan on or off, the Raspberry Pi will control the temperature and heating time so the thermostat and timer knobs went out. I also decided that I have no need for a cooling fan as used in the reflow oven set-up as the 3D printing annealing process uses slow cooling down cycle.
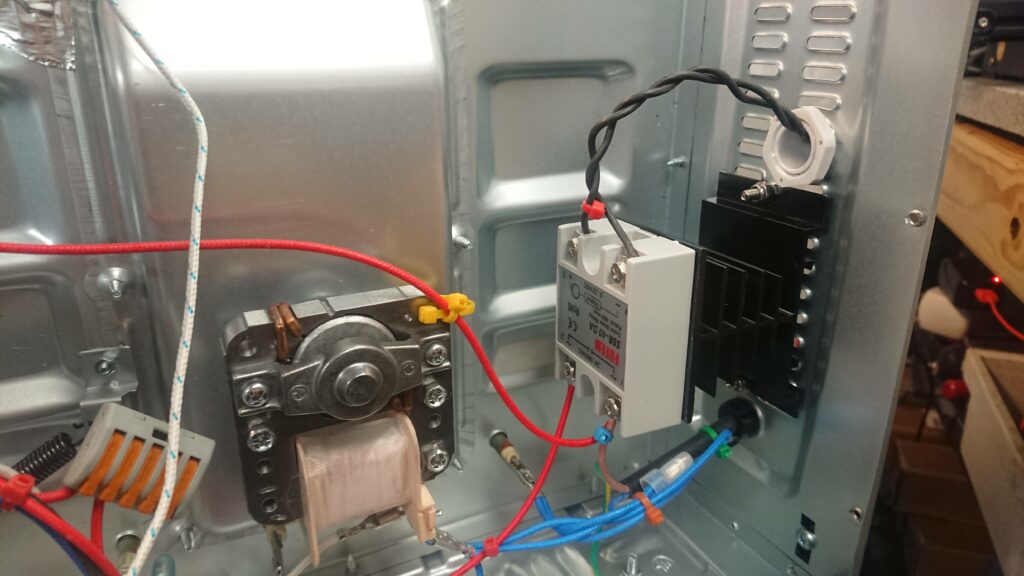
SSR installation with cooling block control wires routed to the outside of the oven at the back together with thermocouple terminals all to make it possible to mount the Raspberry Pi and thermocouple interface board in external case to keep it out of heat for better wifi connectivity and easy maintenance access.
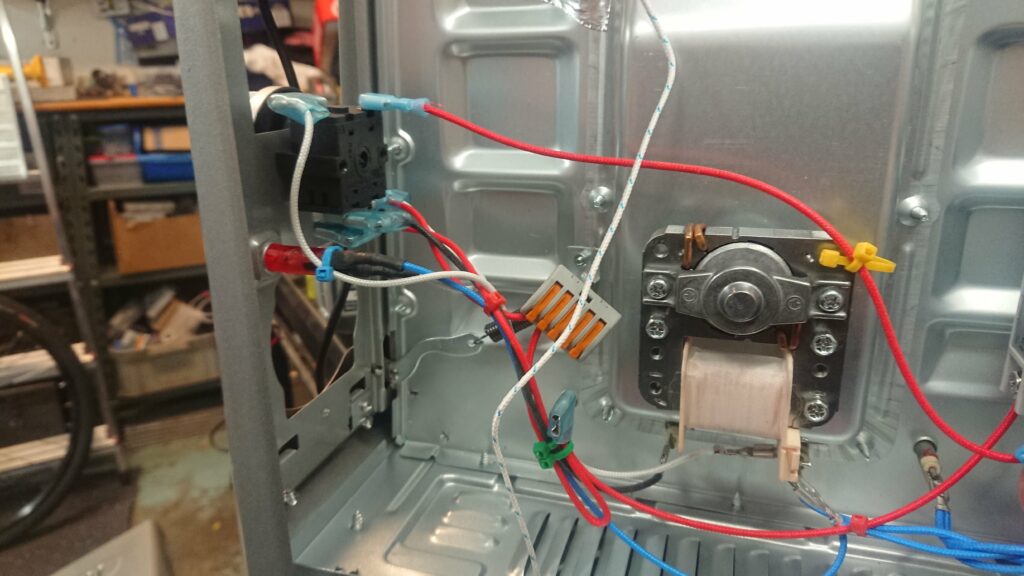 The selector switch with wiring changed to bypass the fan so that it can run separated from the PID circuit.
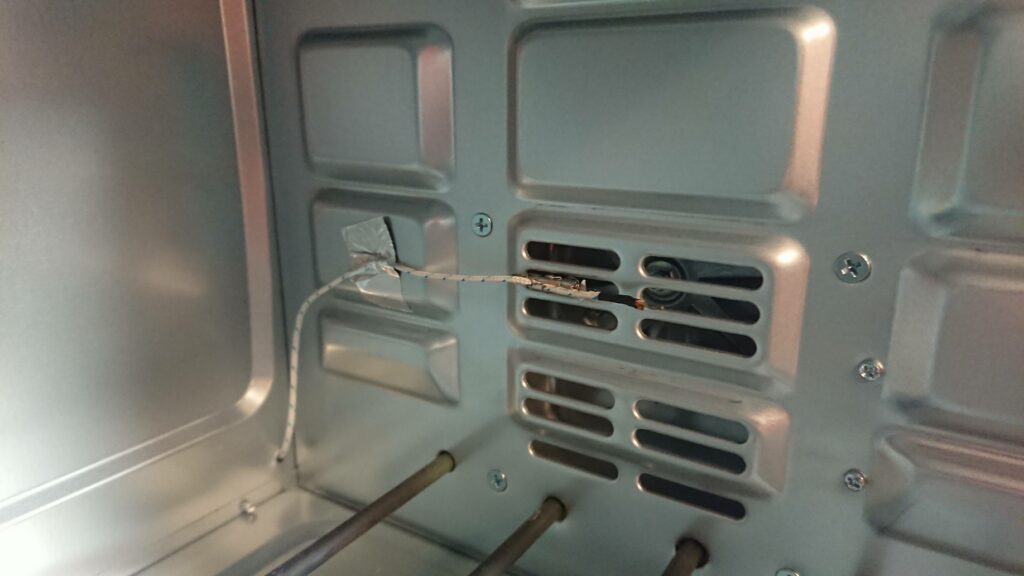
Heating elements moved from the top of the oven so there is now a total of 4 350W heater rods at the bottom picture also shows the thermocouple junction that is positioned in front of the circulating fan to get faster response.
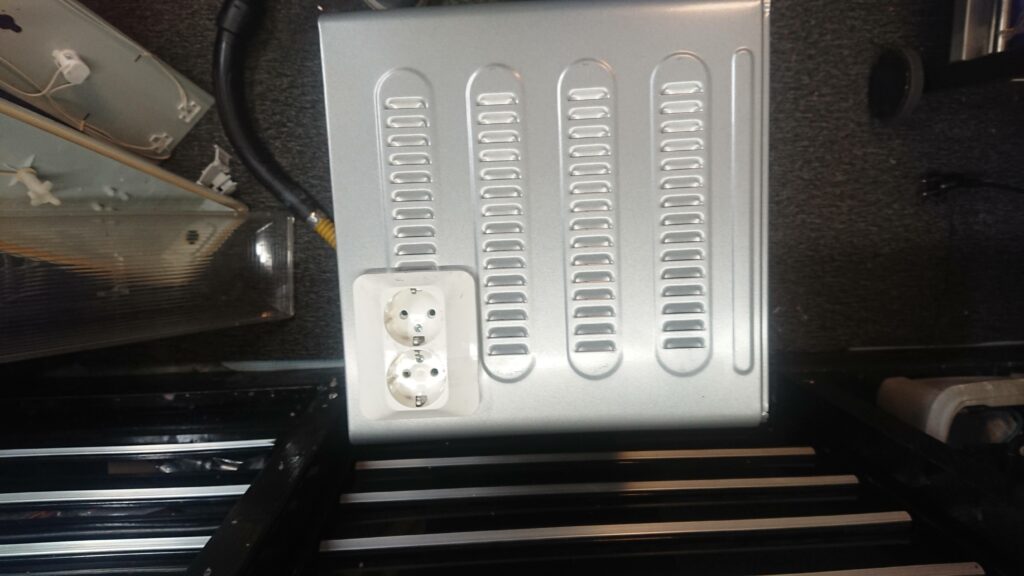
A 220V AC outlet installed on the side of the oven cover in the cold area to provide power for the Raspberry Pi power adapter and one extra for just in case I need another…
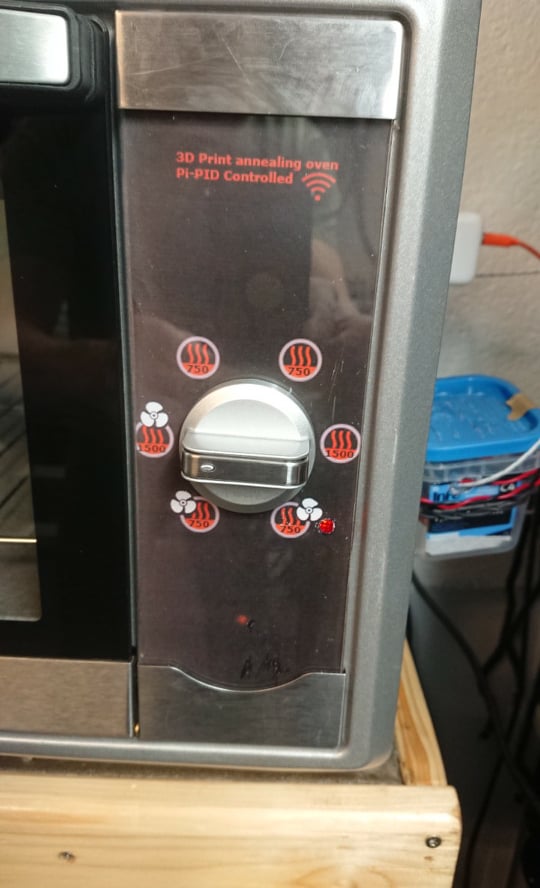
New front panel for the oven to cover the holes from the now removed control knobs the control lamp connected to SSR output so we can se how it cycles.
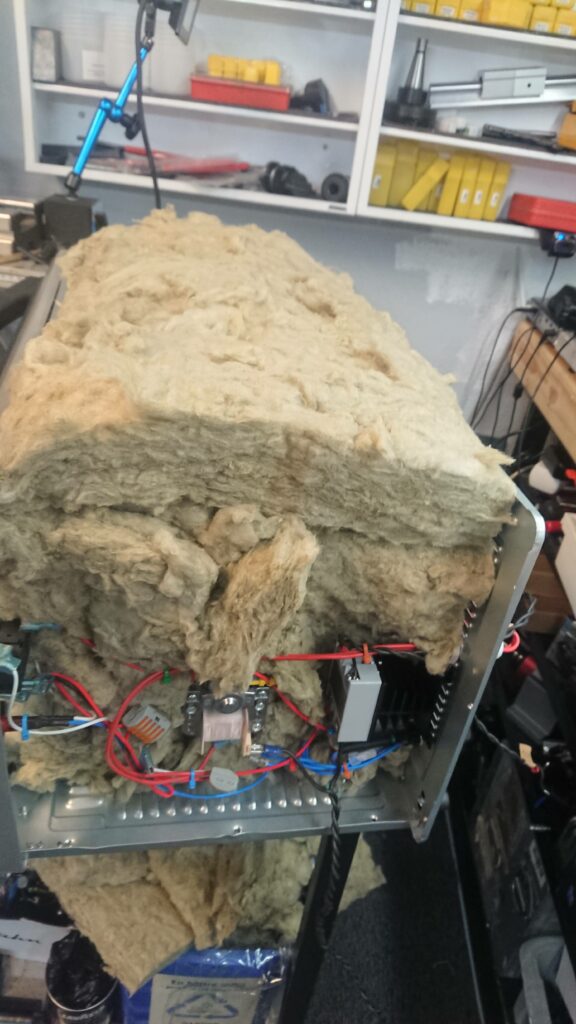
Improved insulation to help the PID to keep the temperature steady.
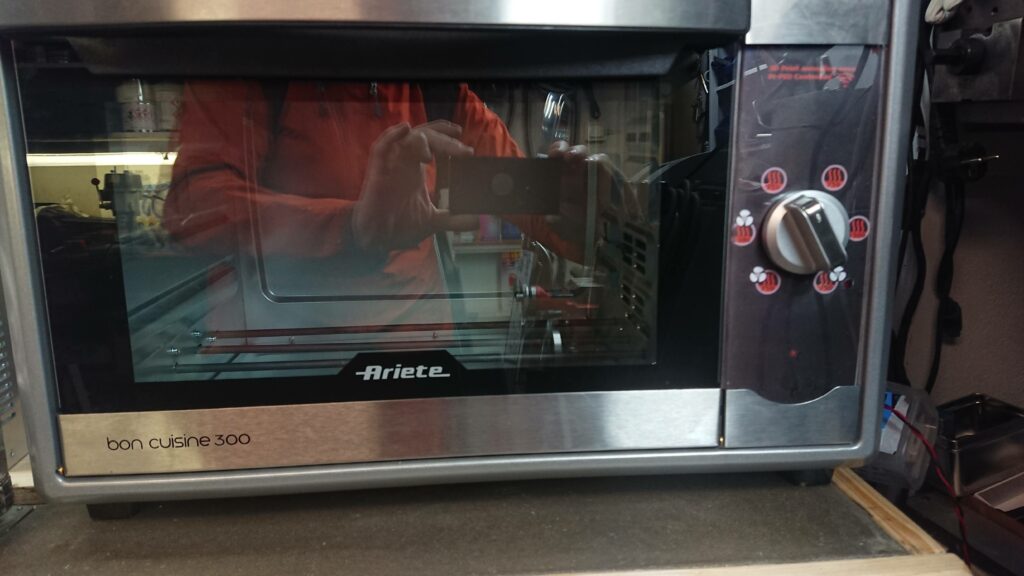
The finished PID oven with the new selector knob and panel marking
How to create a PID ramp and soak cycle.
All of this is better explained by the creator of the software follow the link below.
https://apollo.open-resource.org/mission:resources:picoreflow
Using Salt or sand to minimize distortion during annealing of 3D printed parts.
Many different methods have been tested for the subject of minimizing distortion and dimensional changes of the printed part when annealing it.
Sand works but it can be hard to find sand that have grains that are small enough to keep a smooth surface of the finished part but If you like a little ruff surface it might be your choice.
Plaster can also be used either in powder form or you can mix it with water and make a casting around your print (I never tried any of those methods)
Salt this is the method I have chosen it is easy to get, cheap and you can easily alter the grain size to your preferences simply by putting the salt in to a inexpensive spice/coffee blade grinder. Before I use the salt to pack my prints in I was drying the salt in the oven for an hour (in retrospective I should have dried it before grinding to give the grinder a better life). I used the blade grinder with a small amount of salt until I got a flour/powder like grain (listen to the sound of the grinder to find out if the load is to much for it “large RPM drop when salt gets finer grains). It took about 30-120 seconds / load to get the salt powder fine enough to look and behave like powder.
My advice get a large tray to keep your salt equipment in, large enough so that it also can serve as a salt packing station as the salt dust gets everywhere !
I got my grinder from AMAZON
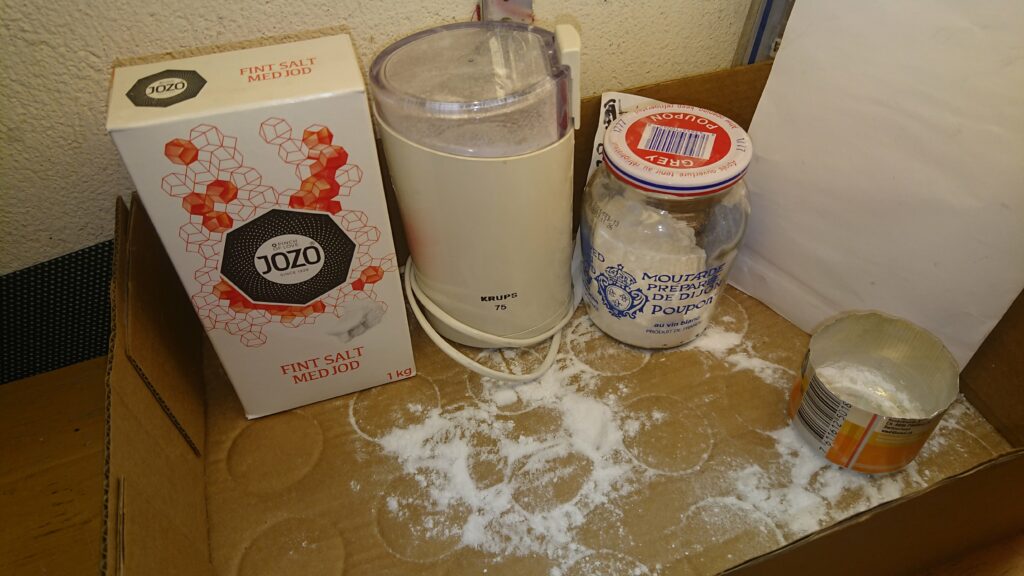
I use a cheap knife grinder to grind the salt to a powder like grain. This makes it easy to pack it hard and even around the subject.
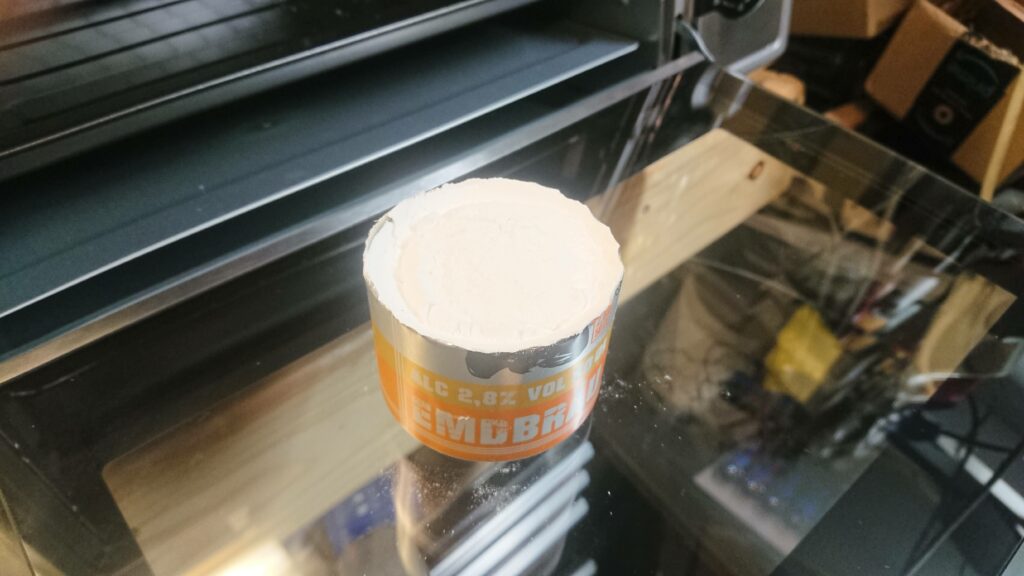
For the test with an XYZ test cube I used a cut off from a beer can (tasted nice).
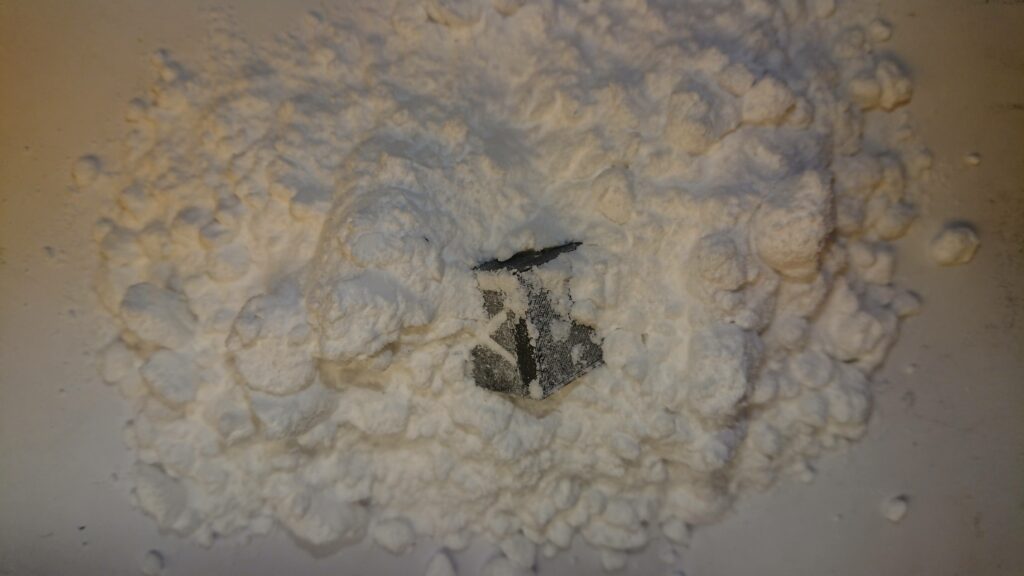
The XYZ test cube removed from beer can after annealing for one hour at 80C, then kept in oven until it had reached room temperature. The print is then removed from the salt casting and cleaned up from remains of salt.
Links to further info (if you want to digg in deep) in regards of 3D print annealing!
themachinebros.com apply annealing to 3d printed parts
prusaprinters.org how to improve your 3d prints with annealing
Video@youtube : Bake your PLA and have it outperform everything else!
rigid.ink : How to anneal your 3d prints for strength
hackaday.com : ANNEALING 3D PRINTS: A SCIENTIFIC APPROACH
A Study of the Effect of Heat Treatment on 3D Printed PLA
Post-Process Annealing of Large-Scale 3D Printed Polyphenylene Sulfide Composites
Free sample pages of the book below. (Have a look at ” 3. Effect of thermal treatment on thermal behavior of poly(lactic acid)” )
And finally a nice book with lots of information in the subject of polymers and heat treatment.
https://amzn.to/3FVGsFI