
Monacor+IKEA = Anthony Gallo ?
This project will generate a pair of desktop computer loudspeakers with an interesting and appealing look (I think) the speaker is also easy to build and doesn't require any extra ordinary skills.
I will start with the parts list for the IKEA vase based speaker.
- IKEA ANGENÄM is a nice looking vase made of soft aluminum, this one will be used as the loudspeaker box!
- Monacor SPX-32M
or similar cheap good looking 3" full range loudspeaker driver with a smooth sound that is easy to listen to and is suitable for a small box.
- Black silicon sealant
- A wooden ball (or why not a champagne cork!)
- Speaker wires or just ordinary lamp wire.
- Some kind of sound deadening material (self adhesive).
- Glass wool or other speaker filling material.
- A nice power amplifier like the great looking and sounding APPJ Mini valve amp
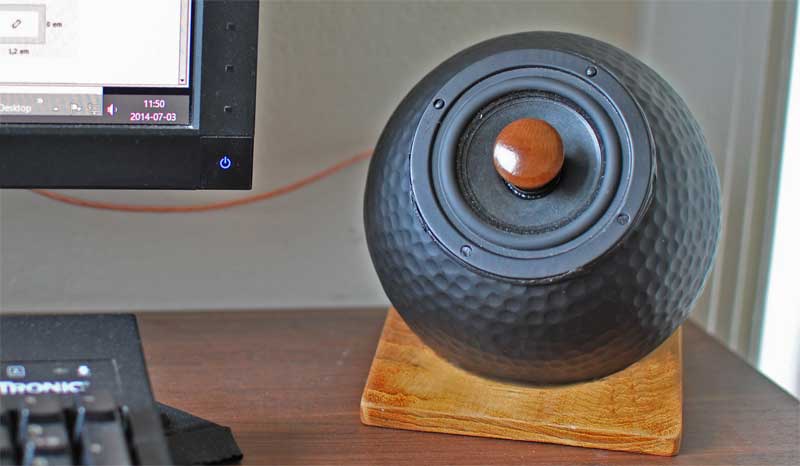
Above: the end result of the DIY IKEA hardware loudspeaker.
Stage:1 of the IKEA/Gallo speaker
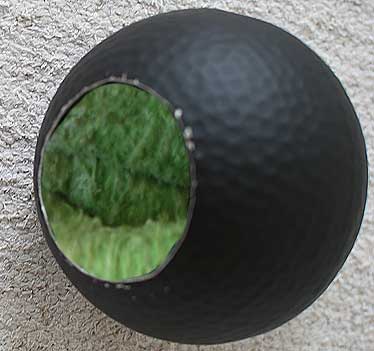
First of all to be able to fit the speaker unit to the vase we need to cut a suitable hole. This could easily be done by drilling a seres of small holes around a circular marking of 70mm.
The aluminum this vase is made of is quite soft so the thin walls between the holes can simply be cut with a sharp Exacto knife or similar, then we use a half round file to tidy up the edges of the hole.
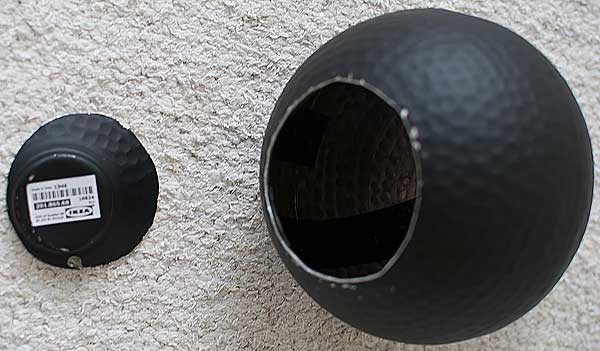
Above: From vase to speaker cabinet, the result of the cutting of the IKEA ANGENÄM ready to become a loudspeaker.
The uncentered cut is intentional since this will give it a higher level of directional adjustment.
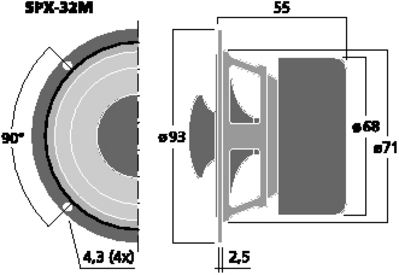
Left:Monacor SPX-32M dimensions.
Stage:2
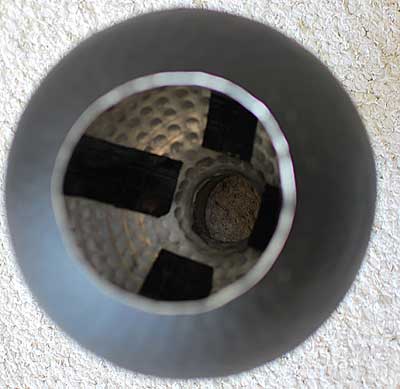
The aluminum vase now sings like a bell if you just slightly tap it with a metal rod or similar. To fight the ringing we will now dress the inside with some stripes of sound deadening material (get it at your local car parts store) the inside of the vase should look like the image below when you are done.
4 1" stripes of sound deadening material was enough to get it knock dead! ' A small advice, use a hair dryer to heat the inside of the vase after you attached the sound pads then press with your finger against them again to be sure the stay in place.'
Stage:3
Fill the vase with some speaker stuffing, I used regular glass wool used to insulate houses, other suitable stuffing would be sheep wool or synthetic fibers that can be bought at your local sewing store (Stuffing for soft toys and pillows). I used a 20X20X2 cm piece in each vase.
Stage: 4
Solder some loudspeaker wires to the SPX-32M unit and pull the wires through the speaker unit mount hole and out trough the vase throat.
Note: Make sure that you have marked out + and - leads properly.
Stage: 5
Mount the speaker unit to the vase with some silicone sealant then clean off the excess and let it cure for 24 hours (This was the most difficult thing to do since I'm an inpatient kind of guy ;0)
After 24 about hours, tidy up the sealant by using more of it and or remove some with a sharp tool.
Stage: 6
Make an hole in your champagne cork wood disk or wooden bead to let the speaker wires through and then mount it in the vase throat to make the box sealed.
Stage: 7
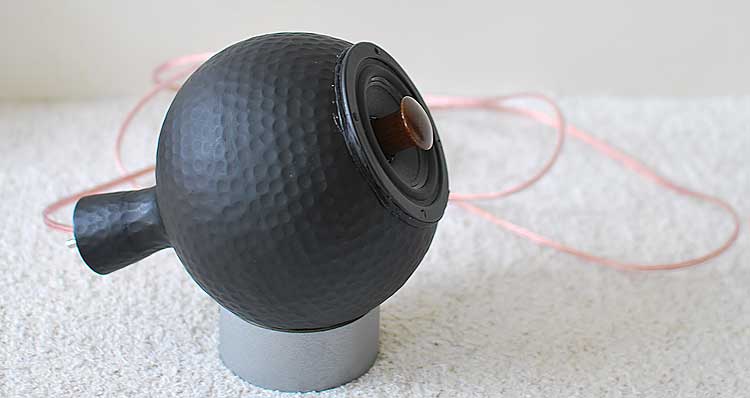
Since the "box" is spheric you will need a stand of some kind to keep it from rolling around, the simplest stand could be an old pack tape paper roll or like in the pic below a wooden brick or wedge with an hole in it.
The shape of the speaker and the stand makes it easy to adjust them to the correct listening angle.
Tape roll speaker stand.
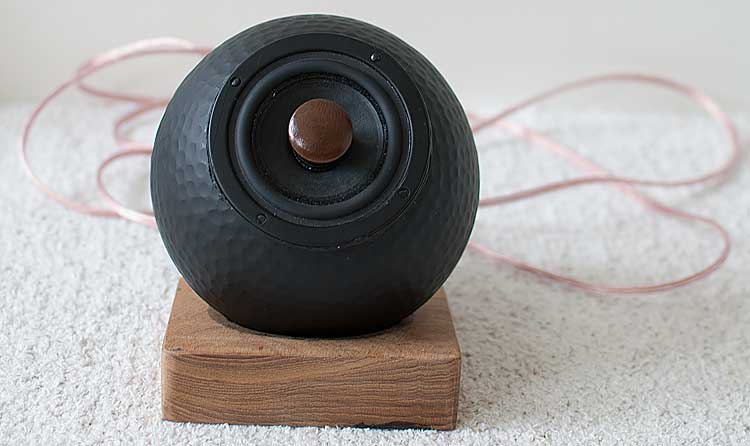
Hardwood wedged speaker stand can be used in any direction
to make the listening angle even more adjustable.
Stage: 8
Lean back and admire, then hook them up to your amplifier and computer and listen to the result. Sound will continue to improve over the next weeks as the speaker suspension softens and loosen up a bit by the music being played.
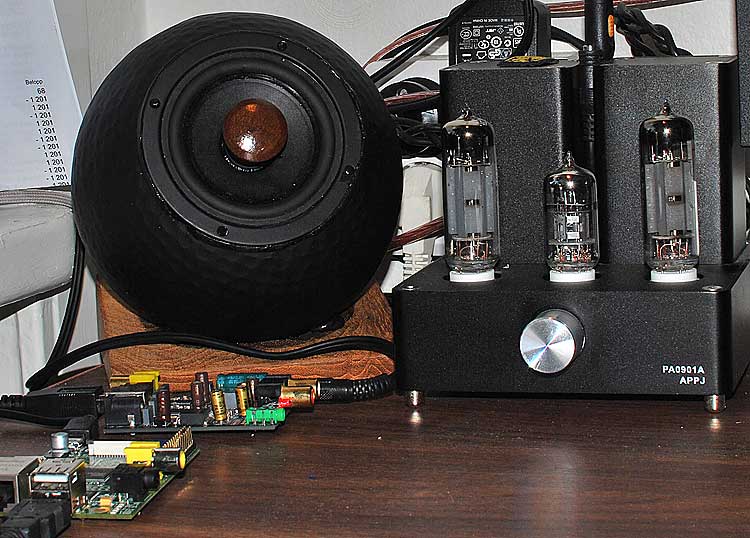
Hooked up with an USB DAC
and TUBE AMP
From EBAY it sound great!
I also recommend Equalizer APO and Peace, GUI for Equalizer APO which will give you a super usable EQ for your PC.
Notes:
The base isn't the deepest but its there, however keep looking back since the next project will be an equally cheap and fancy subwoofer ;0)
Where to buy and what to get
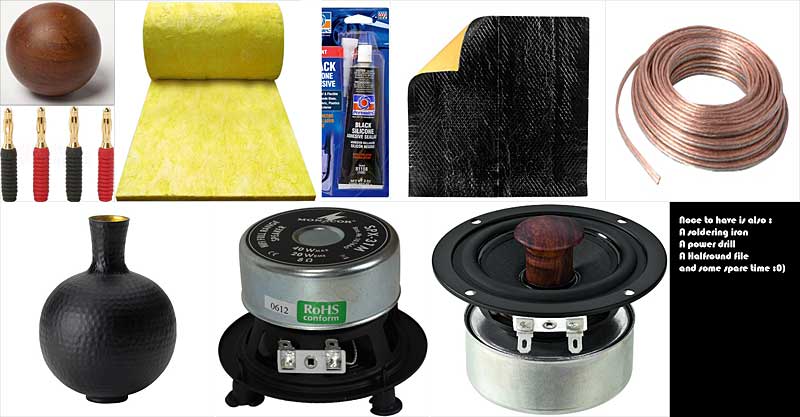
Above: The parts used for this project looks like this.
SPX-32M Data sheet (PDF)