
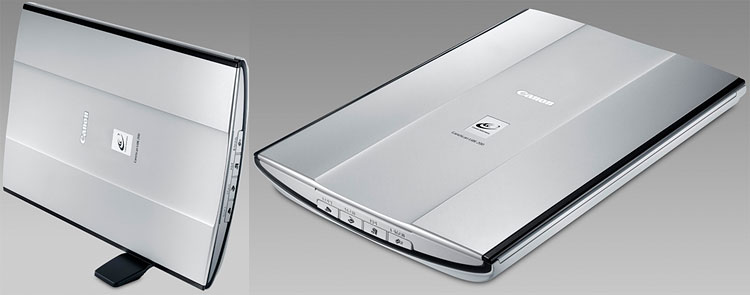
Canon Lide 200 review / Introduction
The canon Lide 200 is a scanner for reflective scanning only and does not scan film.
It comes in a compact package and would be easy to bring along.
Hoked up to a laptop and a Canon Pixma iP90v Photo Inkjet Printer it will become a
compact and lightweight travel copy machine.
You can bring it to your local library to collect material for your research project (ask first).
No external power is needed since it get power from the USB connector, very handy!
I will review the Lide 200 scanner in regards of:
- How the Canon Lide 200 performs in regards of scanning photos.
- Output quality from scanning of magazine text and images.
- Scanning newspaper text and images.
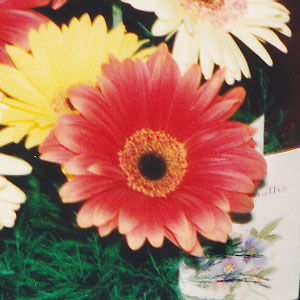
- 3D scanning performance (Items like flowers, a watch etc.).
Scanning photos (Paper copy's) is quite useful for restoration of old photos and in case
you want to make an enlargement of a photo and the original film is missing.
The result from photo scanning is more than adequate to be used on web pages and
computer sideshows if the scanner is of decent quality.
Scanning magazines and newspapers with nice result can also be quite challenging due
to rasterization of images.3D scanning can be rely fun and can in certain cases replace photography and even
outperform it in final result (More about this se links in the last page of this review).
Software
My scanner came with Canon's own scanner software ScanGear and ArcSoft PhotoStudio
Scangear is possible to be used in 3 different modes, Auto,Basic and Advanced.
Different scan modes
Auto scan mode
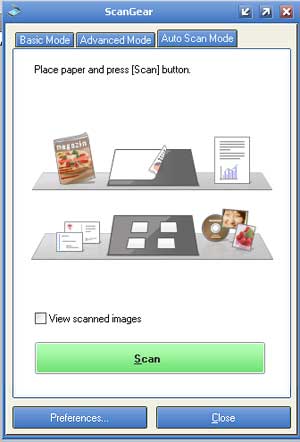
Scan gear in Auto mode just press the
Scan button and pray for a nice result :0)
(some settings cane be made in preferences
menu but I will not review that here)

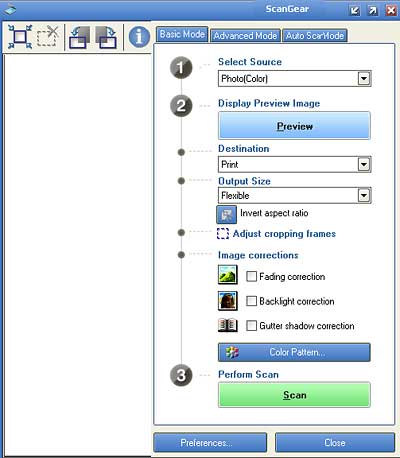
Basic mode will at least give you some basic :0) control over the output result in a wizard like
interface.
Select source: gives you the choice of (Photo Color, Magazine Color, Newspaper grayscale, Doc grayscale)
Destination: Has the following selections (Print, Image display, OCR)
Output size: Changes due to destination selection ("Print" gives you choices of different paper sizes, "Image display" gives you a selection of pixel dimensions and "OCR" has a fixed setting)
Fading correction: tick this box to restore colors of old photos
Backlight correction: If the scanned original is a bit to translucent try this option (for example you scan a newspaper page and you can se the text on both front and back of the page)
Gutter shadow correction: Use this to remove shadows from items that cant be kept close enough to the scanner glass (like a book as the icon shows)
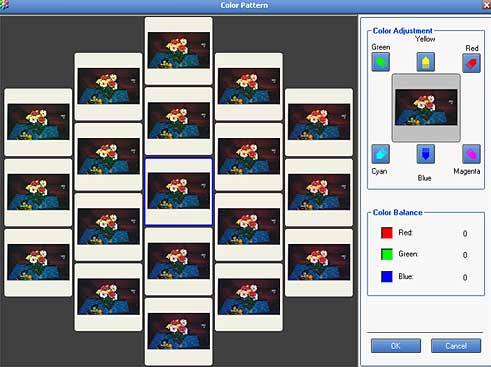
Color pattern: Selector is a quite useful help to find the right color balance, it opens up a new
window with a multi choice selector (just mark the one you like and hit OK) .
Advance mode
Advanced mode gives you full control over the scanner and all the possible modes it can operate in.
This is the mode you want to operate the
Canon Lide 200 in if you want to explore its full quality.
In this mode you get access to and control over:Output resolution: (use the pre selects or write the resolution figures you want)
Output Size: Use flexible for full output resolution and aspect or one of the presets for paper or pixel dimensions
Image Settings: Auto tone and Unsharp masking can be set to on or off (I suggest off those adjustments are best to be done in a proper image editor)
Image Settings: Descreen intended for scanning newspapers and magazines to avoid raster patterns (only on or off)
Image Settings: Reduce dust, fading, Grain, backlight and Gutter shadow correction has optional settings (None, low, medium and high)
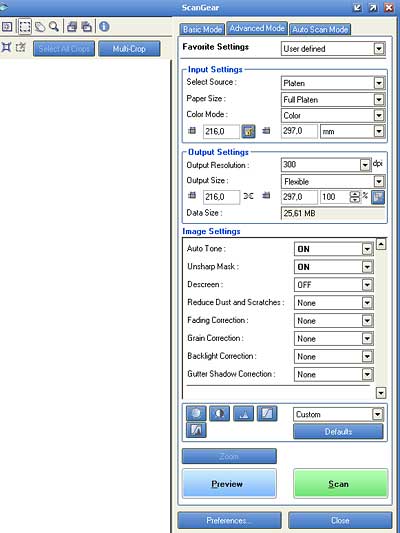
The icons above is buttons that brings up different color tone correction tools from left to right:
- Saturation/color balance tool
- Brightness/contrast tool
- Histogram/tool (color pickers for whitepoint, midtone, blackpoint and gray balance)
- Tone Curve Settings
- Final Review (just a viewer no setting possible here)
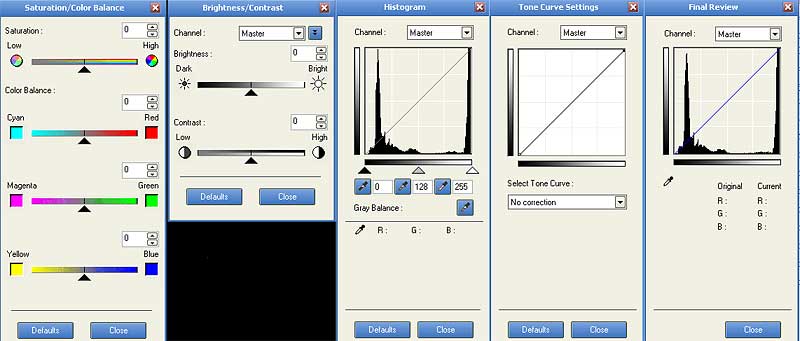
I find the Tone Curve Settings and Histogram tools to be most useful of the tools available.
If you have an area with a neutral gray color the gray balance picker will be useful to.
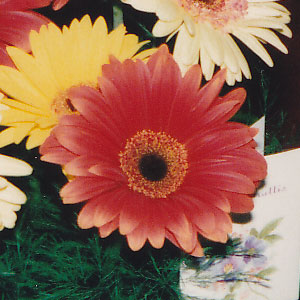
Colors from Auto mode scan 100% crop from 300ppi scan (No control over any settings at all!) Slight sharpening with USM added afterwards.
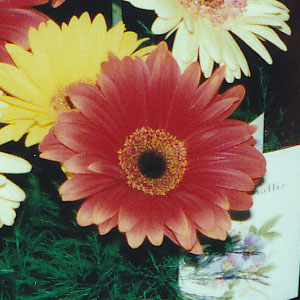
Colors from Basic mode scan 100% crop from 300ppi scan (Print and flexible settings used+color pattern selector!) Slight sharpening with USM added afterwards.
Colors from Advanced mode scan 100% crop from 300ppi scan (Control over many settings and curve tool used to get this colors, in scanner sharpening and auto tone set to off!) Slight sharpening with USM added afterwards.
Scanned at 300ppi will produce a file size that will let you print a copy in 300dpi at the same size as the original.
I suggest that all buyers of this scanner starts to learn the advanced mode, since the other modes is far to basic.
If you prefer to have full con troll over everything, get VueScan you will not regret it.
From now on I will use Advance mode and maybe in some cases VueScan! (I let you know when)