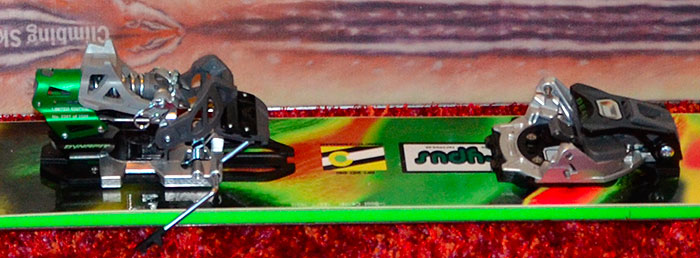
Dynafit Beast 16 AT bindings installation tutorial aka the green page!
I had a hard time trying to find instructions of how to install a pair of Dynafit Beast 16 AT ski bindings I finaly made some templates for screw patern and drilling and did a write up of how to install the Dynafit Beast bindings so here it is, enjoy!
 |
|---|


Step 1.
Download this [Dynafit Beast 16 2013-14 Drill template]
Password for download= stockholmviews.comStep 2.
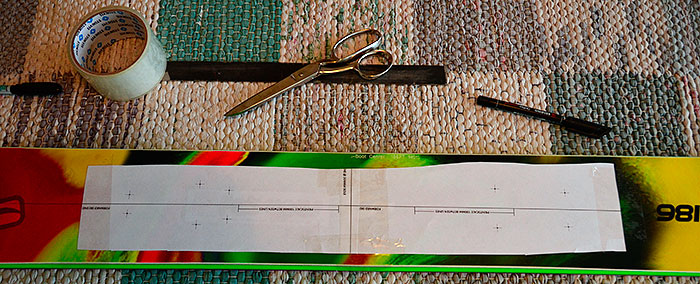
Print the Dynafit Beast 16 template in two samples (Both parts x 2) and make sure that you print it at 100% then double check with a ruler at the 100mm marks that the print was printed in the correct scale.
Now assemble the two parts of the template with tape.
Instructions of how to alter the template to fit the boot size is printed on the template printouts.Step 3.
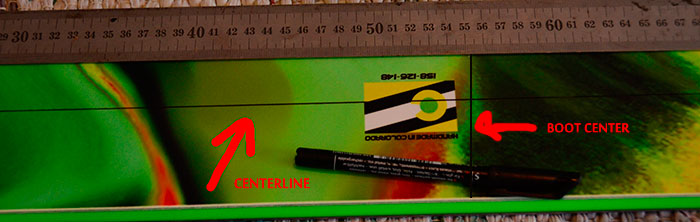
Mark out the ski boot center (Or your preferred boot center) on both skis, also make a ski center line with a marker.
Step 4.
Tape the Dynafit Beast 16 drill template to the skis and make sure the center lines and boot center lines line up with the marks you previously made on your skis.
Step 5.
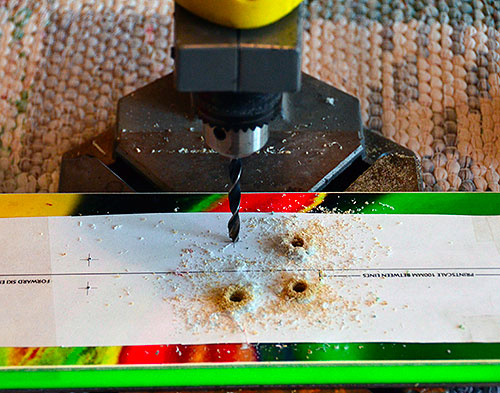
Use a awl or a nail to make drill guide holes in the skis at the drill marks. then use a drill press
or Drill Guide
Make sure to use a drill that suits your skis and the screws you chose to use (For the original Dynafit screws use a 4mm drill bit and drill 9.5mm deep) you can use a slightly larger drill 4.2-4.5mm if your skis has metal layer near the top sheet).
I used a drill pressStep 6.
Clean up the holes. Use a sharp knife then use a vacuum cleaner to get all the dust out of the holes.
Step 7a.
If yo choose to use the screws that came with your Dynafit Beast 16n's then just put some good long cure (24 hour) epoxy glue in the holes and mount your bindings.
IMPORTANT: Remember to start with the small plastic pice that should be mounted under neat the front part of the toe binding.Step 7b.
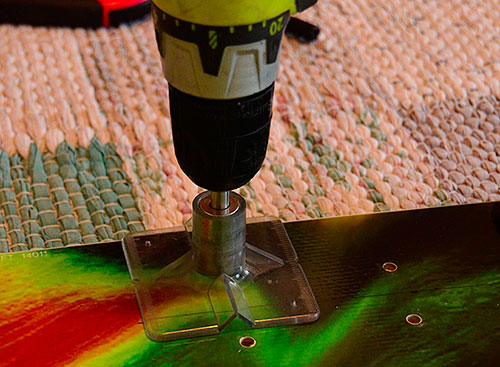
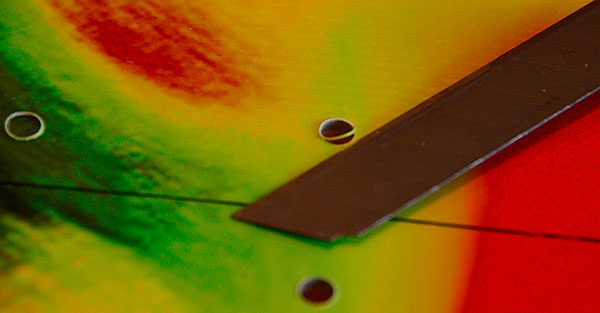
I used inserts to mount my Beast 16n's so I had to thread the holes with a 5/16-18 bottom tap.
If you intend to use inserts make sure to put them exactly straight or you will end up with problems.
I used a drill guide to keep the tap at 90deg to the ski surface.
To tap the holes I used a battery powered cordless drill with the ability to limit the torque. I started with the lowest torque and worked myself up to a level where the tap reached the bottom of the holes.
The Drill GuideStep 7c.
Mount the inserts following the instructions from the insert brand of your choice (Always includes epoxy glue in the holes).
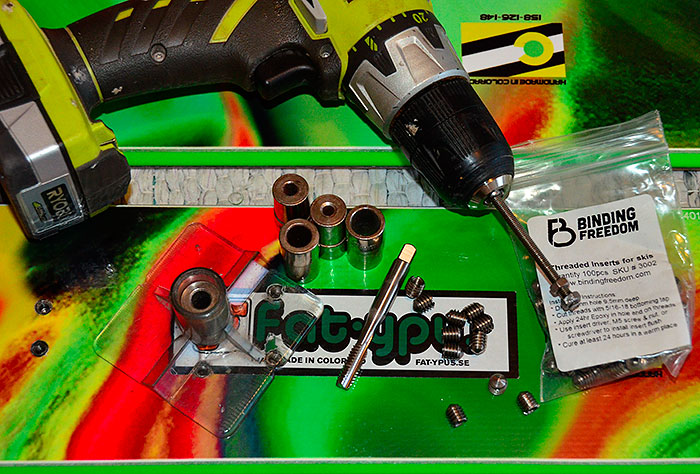
Tools that I used to mount the inserts cordless drillInstall the bindings with scews with correct length and make sure to not over torque, use some soft screw lock fluid to make sure they don't come loose to easy.
You will need the foolowing lengths and amount.
4ea. 10mm csk flat or button heads with head dia reduced to 8mm
8ea. 16mm csk flat or button heads with head dia reduced to 8mm
8ea. 12mm csk flat or button heads with head dia reduced to 8mmTo reduce the heads, simply put an insert in the chuck of a power drill, the screw in to the insert and use a file to grind them down to suitable size.
Step 8.
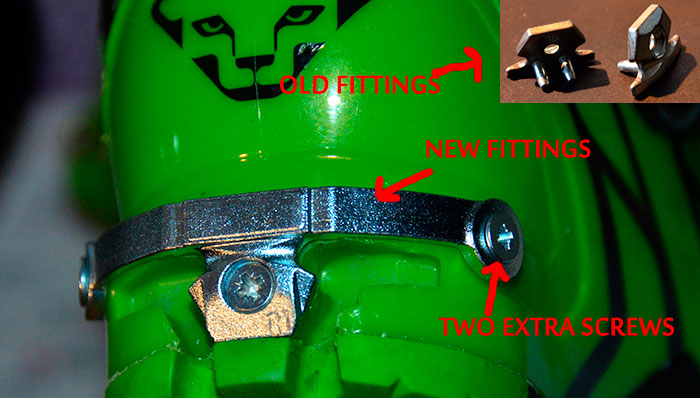
Replace your Original tech Dynafit heel boot fitting with the horse shoe fitting.
The new fitting should be in the box and delivered with the Beast 16n's. This is the easy part just remove the screw holding the original metal fitting then gently pry or pull it straight out of the boot heel with a suitable tool.
Then put the horse shoe fitting on and tap it in place with a piece of wood or a plastic mallet. Now mount the original screw in the center hole. Make sure the horse shoe fitting is in place and aligned on the boot heel then drill a small hole for the two extra screws (I used a 1.5mm drill) finally put some epoxy glue in the holes and mount the screws and you are done.
Step 9.
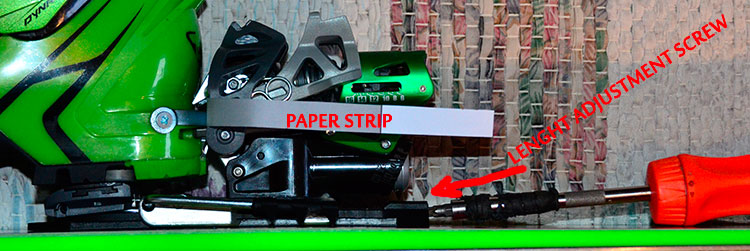
Final adjustment to make the binding to fit your boots perfectly.
a. Put the boot in the binding in ski mode.
b. Open up the binding with the length adjustment screw just enough to easily get a strip of copy paper between the horse shoe fitting and the heel binding.
c. Adjust the binding until the paper get stuck between the binding and boot then adjust back (loosen tension) at the same time as you slightly pull the paper strip outward to a point where the paper can be easily pulled out, now you are done with the boot length fine adjustment.
Note: X-check in both skis with right and left boot since boot sole length might vary due to tolerance.
Step 10.
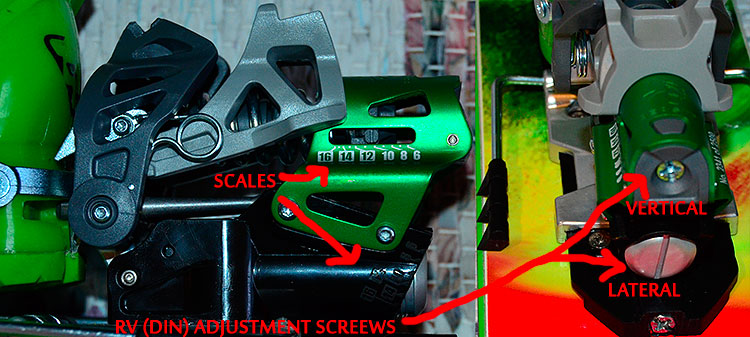
Adjusting the release value RV (DIN isch)/pre tension.
There are two screws to do this and you should put both at the same value (a value that roughly corresponds to the DIN scale) .
The choice of value is a matter of taste, skill, body strength and your weight.
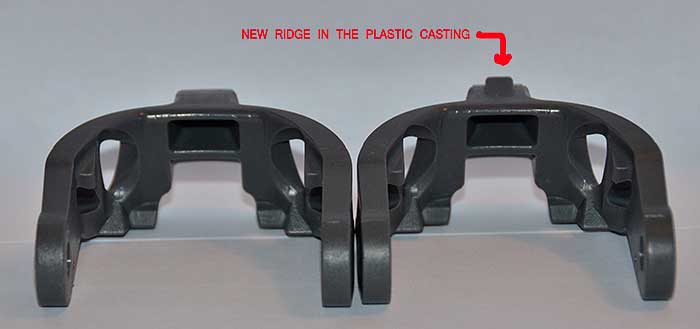
During the installation of the Dynafit Beast 16 on my new FatYpus I-rock FT's I found an issue with the ski brake touring lockout function.
It was impossible to get them to work even if I was using a lot of force I could just not get the ski brakes to lock in touring mode.
After contact with Dynafit I was told that there have been some updates to that part of the bindings.
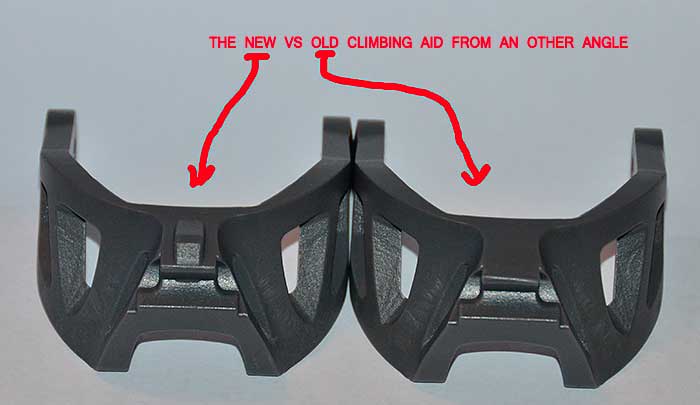
The updated part is the climbing aid and in the pictures below you can se the difference that made them work just fine!
A new small ridge have been added to the casting of the climbing aid.
The old one on the left for comparison!
A short review of the Dynafit Beast 16.
I have now been skiing the Beast 16 for almost two seasons and have not had any issues with them. The Dynafit Beast 16 together with my Dynafit Vulcan boots simply performs as good as my regular alpine setup (Being a 178cm tall and 73kg guy).
My single complain is the fact that it can be kind of hard to switch from tour to ski mode since the ski brake latch are rather stiff when locked in and hard to brake out. This is nothing that cant be solved with the use of a ski pole as a pry-bar but it would have been better/more convenient if I easily could have changed mode with gloved hands.
They Beasts tour extremely well to be such a ski-able pair of tech bindings but that didn't come as a big surprise. In this discipline pin toe bindings has no competition right now!
The happy surprise was that they feels just like a pair of alpine bindings and not at all hard and undamped like my Plum Guides, the later can make you believe that you bones will brake down and crack when you ski some ruff hard snow, not so with the Bests they feel damped and controlled like if I was skiing my Look bindings.
I have been on a pair of FatYpus I-rock FT skis those are rather fat at 125mm waist and the bindings have had no problem controlling them in all sorts of terrain and snow conditions, this ski/binding combo feels light and at the same time stable to the extent that I forget that I'm skiing a freeride/tour setup it just feels right.
The full production series that have been sold durin the 2014/15 season are delivered in a different color, more than that I cant find anything that have been changed in relation to the limited edition version that I have been skiing.
Would I recomed them to my friends? YES!
Would I buy them agai if I needed? YES!On a 10 graded scale I give them 9 but that -1 is only as penalty for the price tag!
NEW for 2015 is the little brother Dynafit Beast 14! this new binding share some components with the Beast 16 (the heal) and some with the Radical 2.0 (Toe) the price is also slightly reduced compared to the Beast 16.