
Epson Prefection V850 Pro - The fluid mount tray.
This part of the review will be about the Epson Perfection V850 Pro and the free optional fluid mount accessory. I will try to straighten out questions like is it worth the extra hassle to use the fluid mount tray?
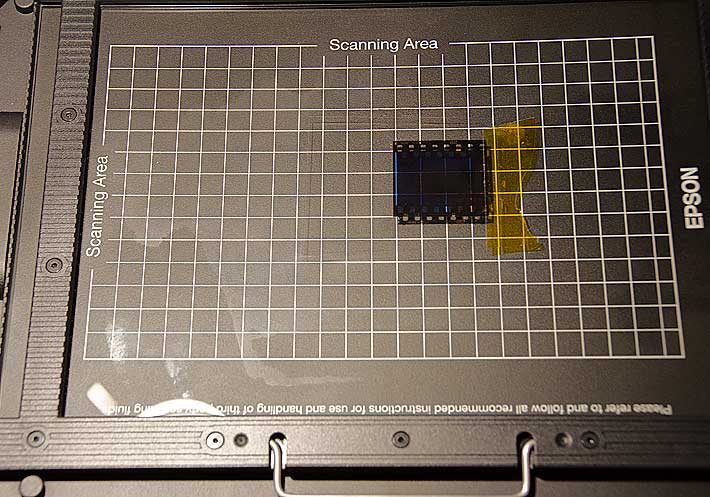
This is how it looks, the fluid mount put on the mount station and with the film fluid mounted. Note the mylar film on top of the film and the tape (That doesn't leave residue) that assist to keep everything in place.
Why!
Well wet or fluid mounting of film does have both drawbacks and positive effects for scanning film I will try to list some here.
- + Fluid mount helps to even out and mask minor scratches dust and defects, it also slightly smooth out film grain.
- + It does keep the film 100% flat.
- + Any size of film that fit the glass surface can be scanned.
- + Used right it will get you the best possible scan from the Epson V850 Pro.
- - You get 4 more surfaces that can and will attract dust compared to a zero glass holder (Both sides of glass of fluid mount + the two sides of the mylar film above the image film.
- - You have to learn how to squeeze out air bubbles between the film and glass/mylar in the best way, yet still being able to accept that you didn't manage to avoid all of them!
- - Fluid mounting requires fluid and mylar film and apart from being awkward to work with it will add cost to the scanning.
- - Time consuming.
- Not really a minus but the color balance get altered when I use the fluid mount so I advice you to create a new profile to use with this accessory.
Wet versus dry scan
 1-1
1-1 2-1
2-1This scan was made in the 35mm framed slide holder. It does not have any additional glass between the scanner lens and the film other than the glass bed. No sharpening applied.
This scan was made using the fluid mount accessory. It does ad one extra layer of glass plus a mylar film on the light source side. No sharpening applied. It does look a bit softer than the one to the left here but just slightly. It might just be my eye that have been fooled by the color difference in the scans.
 1-2
1-2 2-1
2-1The above 35mm slide frame scan again, now with sharpening applied as bellow.
- A400 R1.0 T1
- A300 R0,3 T1
- A500 R0,2 T0
The wet scan again this time with sharpening with the same figures as the one to the left in this row (1-2). I find it odd to see that this scan contains more noise (or is it really film grain). It also appears to be a bit sharper than 1-2 and also to have less artifacts from the sharpening (witch is a bit over the top just to highlight the difference).
All scans was done at 6400ppi and downscaled to 4000ppi. Crops above are at 100% and equal to about a 2mm wide and 2.7mm high section of a 35mm slide film!
Wet mount accessory - conclution and verdict.
In 99% of the cases I wouldn't bather to use this accessory, simply because it is to much work and to little gain. However in some cases the fluid mount accessory can be a life saver. Like when you scan a odd sized film or a film with lots of fine scratches.
Another issue with the fluid mount is that it doesn't have the height adjustments that the other film holders have. I was lucky and my V850 Pro did match the fixed distance that the fluid mount have.
This problem can easily be solved if you need to increase the distance, simply by using some tape to layer up to a suitable height. But if the film end up to be sitting to high due to factory tolerance the solution isn't all that easy to bridge.
In most cases and when you do have a suitable film holder, it is more effective to spend some extra time to correct and optimize the final scan in you favorite software.