Canon Canoscan 9000F review by Stockholmviews.com


Canon Canoscan 9000F internal parts and glass bed cleaning

[Page 1]  [page 2] [Scanner cleaning]
 

The Canon 9000F flatbed scanner will get dusty and dirty externally as you use and
handle it, and the shiny parts will get finger marks (unless you use cotton gloves all the time) and
even if the Canon 9000F is kind of properly sealed it will also get dusty internally over
time like most other scanners.

I will now show you how to get inside the Canon Canoscan 9000F to clean its internal
parts and the inside of the glass bed. [Disclaimer]

To clean your Canon 9000F you will nead the following things.

   
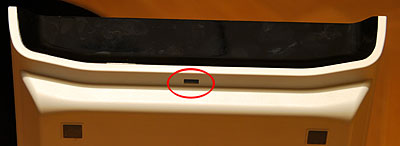
Removal of the front pannel of the Canon 9000F scanner

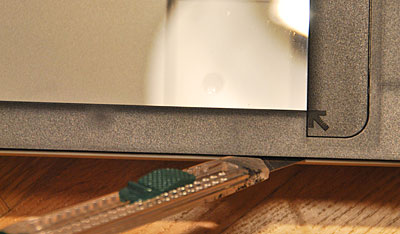
To remove the front panel of the Canon 9000F, release the plastic
tab/hook in the lower center part
at the front of the scanner, then
slide the black part upwards in the
direction of the glass bed to remove
it (Some force are needed here to over power some snap locks)

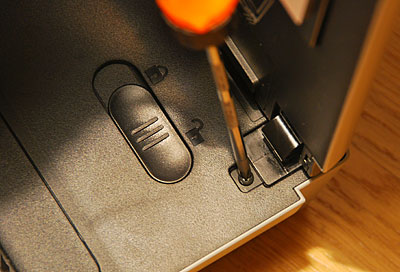
Canon Canoscan 9000F, removal of the lid for cleaning

Now remove the two screws that are
holding the lid of the scanner. One
in each corner.

Then lift of the lid to reveal the two
hidden screws that has to be removed to allow the glass bed to
be lifted off.

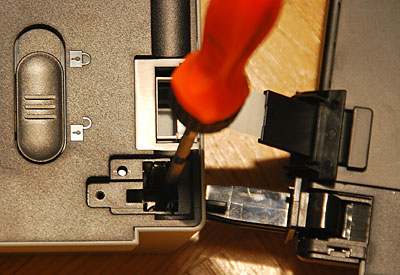
Canon 9000F Scanner glass removal for cleaning purpose

Be careful not to damage the ribbon
wire that connects the lid to the
main part of the scanner.

It is possible to disconnect the
ribbon wire but it is not necessary
for the cleaning process.

Screws holding the glass bed can
be unscrewed when the lid is lifted
away from the scanner body.


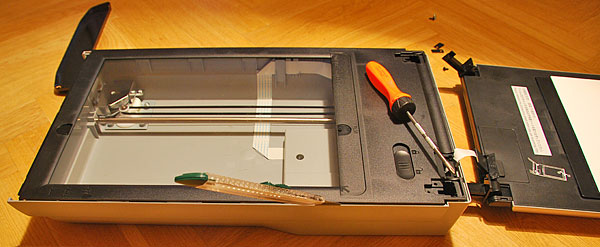
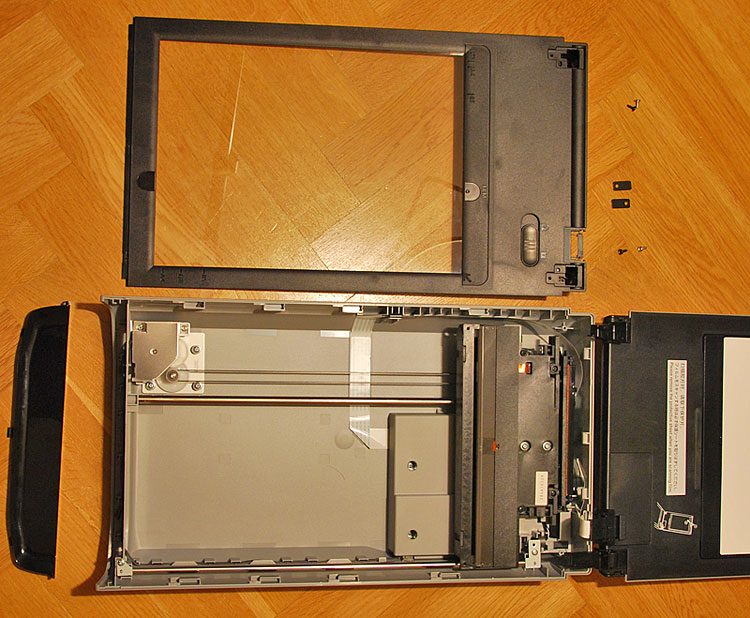
Lid removed from the Canon Canoscan 9000F     
Above: At this stage the 4 screws by the lid hinges is removed, the front panel is
also removed and put aside. Now carfully use a thin strong plastic or steal blade to
gently unlatch the snap locks around the edges of the scanner to remove the glass.

Scanner glass removal on the Canon 9000F flatbed scanner

This was the part of the
de-assembling that felt most
scary however in the end it showed
to be less dramatic than in first appeared to be :0}
Cleaning dust from the inside of the Canon 9000F scanner glass
Now we are inside the scanner so I hope you chosed a dustfree envoirement for your
scanner surgery, the cleaning can now be performed.

Start with a soft brush to remove most of the dust, this prevents the dust from
contaminate your cleaning cloth to avoid scratches on the scanner glass.

I suggest that you use some disposable sealed Wet/Dry Screen Wipes for the final
stage of the cleaning for the best possible result.

An alternative cleaning solvent could be 100% clean isopropyl alcohol or some kind of spectacle lens cleaning solution and a soft lint free cloth.

Canon 9000F lid to scanner ribbon wire


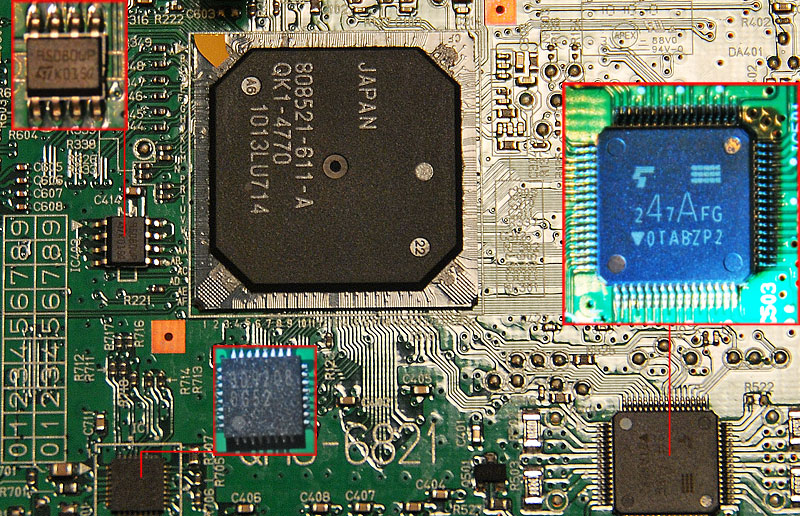
Below an image of the internal chip's parts and circuit board of the
Canon Canoscan 9000F to support the development of Linux SANE back end.

 
Users of Ubuntu and other Linux distributions that are looking for a grat flat bed
scanner should look for the Canon 8800F untill the Backend driver for the 9000F is
available.

When the 9000F backend is released you will be able to find information about it
here.

Linux scannerlinks

 
UPDATE:2014-10-17 http://www.sane-project.org/sane-mfgs.html#Z-CANON
Canon Canoscan F9000 and 9000 Mk II now fully suported by SANE linux!
 
 
Canon canoscan 9000F internal circuit board and chip set revealed by stockholmviews.com
Click image to get a larger version. (This image might help SANE developers)

[All information and instructions should be used with common sense in mind since I don't take any responsability if you unintendantly destroy or damage your scanner :0) however don't panic it realy isn't that hard!]


 Comment this review here!
 
[Page 1]  [page 2] [Scanner cleaning]
 
Gallery | D.I.Y | Reviews | Shop | Blog | Contact