
Diy photo gear by Stockholmviews.com
Final assembly
Lens mount and bellows support!
I will stick to wood and aluminum wile constructing this part to.
Because wood is easy to work with and it is lightweight
just like aluminum!
I will stick to wood and aluminum wile constructing this part to.
Because wood is easy to work with and it is lightweight
just like aluminum!
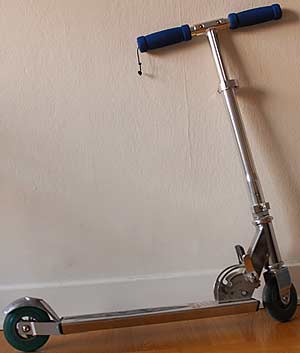
I found this one in the basement and I guess that there are many
of those put away for ever around the world :0)
of those put away for ever around the world :0)
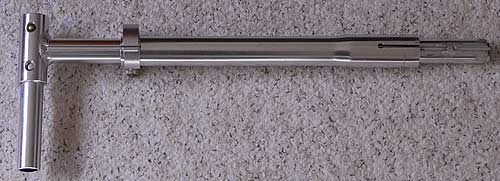
My plan is to use the steering column, it will become the focus
adjustment unit!?
adjustment unit!?
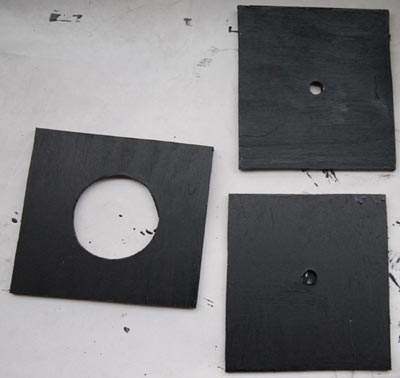
3 ea squares of 6mm Plywood.
The one with the big hole is the one that are going to be permanently
attached to the bellows.
The other two will have the hole enlarged to fit the lenses to be used.
A rubber seal surrounding the lens boards will keep this simple
lens mount light proof (right hand image above).
The one with the big hole is the one that are going to be permanently
attached to the bellows.
The other two will have the hole enlarged to fit the lenses to be used.
A rubber seal surrounding the lens boards will keep this simple
lens mount light proof (right hand image above).
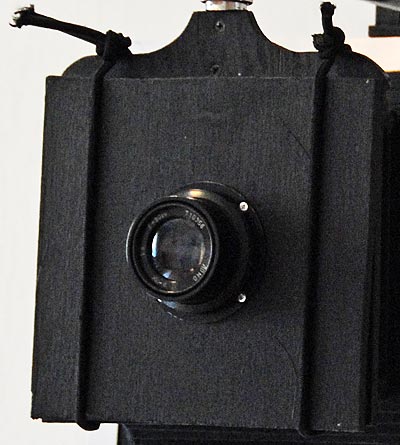
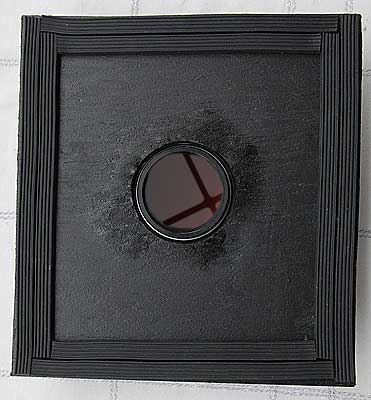
This is how it works, two rubber ropes hold the lens board tight to the
board that are permanently mounted to the bellows.
This quick mount makes it very easy to switch between lenses wile
in a hurry :0)
board that are permanently mounted to the bellows.
This quick mount makes it very easy to switch between lenses wile
in a hurry :0)
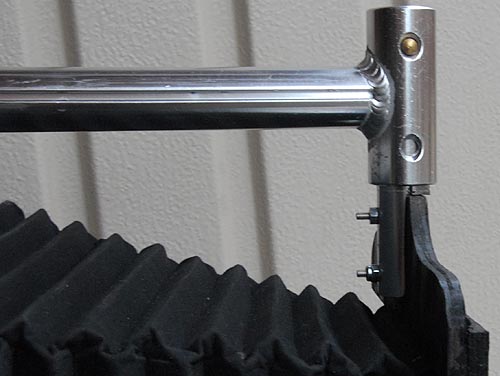
Steering column modified and mounted to the bellows front plate.
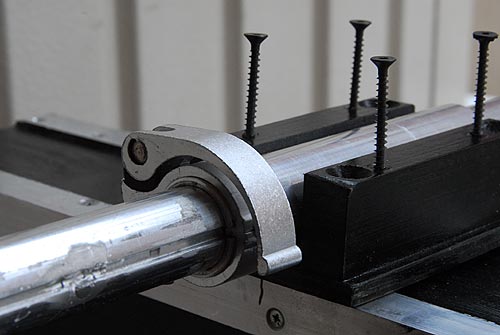
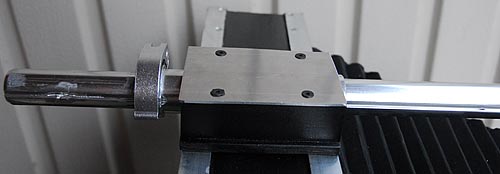
This is how I mounted the focusing bar "Kick bike steering column"
to the camera housing, black parts are wooden.
You can see the quick lock unit of the column that will keep the
adjustment of focus latched to the left in the images.
to the camera housing, black parts are wooden.
You can see the quick lock unit of the column that will keep the
adjustment of focus latched to the left in the images.
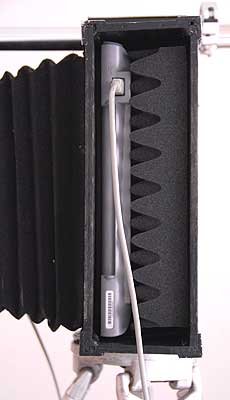
Scanner itself also have rubber seals surrounding the glass and the
opening at the back of the bellows in the camera housing.
I used the same type of rubber seal as used on lens boards.
Foam is used to hold the scanner tight against the bellows opening.
opening at the back of the bellows in the camera housing.
I used the same type of rubber seal as used on lens boards.
Foam is used to hold the scanner tight against the bellows opening.
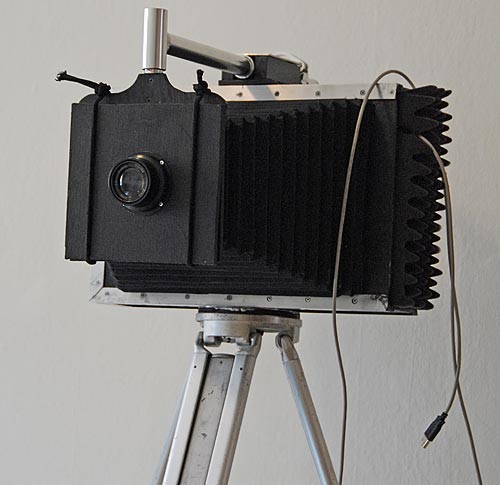
This is how the finished camera looks on the Kern tripod.
Scanner inserted and scanner loading slot sealed with some foam
material to be sure to keep stray light out.
Scanner inserted and scanner loading slot sealed with some foam
material to be sure to keep stray light out.
[Links related to this project]
-
EFT tools (To remove scanner streaks)
-
4N6site (free fourier transform plug-in possible to use for scanner defect removal)
-
Ubuntu (The linux distro I use, comes with Xsane and Gimp)
-
Gimp (Photoshop like image editing software for free linux/windows)
-
Xsane (Scanner software for linux)
-
Mike Golembewskis scanner camera (I found my inspiration from this page)